
Disclosure: CraftEaze is a participant in the Amazon Services LLC Associates Program, an affiliate advertising program designed to provide a means for sites to earn advertising fees by advertising and linking to Amazon.com and affiliate sites.
Are you looking for a cool way to display photos at your wedding? Or even for an easy DIY project to hang up photos of your kids? If so, look no further then this project. In this post, I will teach you how to make a wooden photo sign. If you like this project, then be sure to check out our other how-to posts (Wooden Wedding Sign and Unique Notebook).
Materials Needed
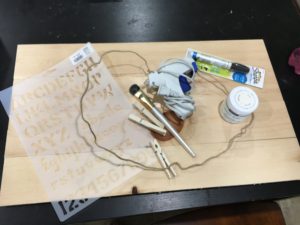
To make this project you will need:
- 20″x14″ Unfinished Wooden Panel
- White Chalk Paint
- Black Paint Pen
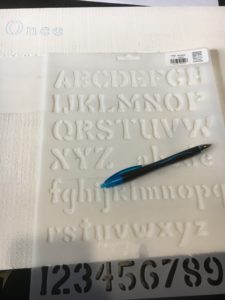
- 1″ Alphabet Stencil
- 3 clothespins
- Hot Glue Gun
- Wire Twine
- Paintbrush
CraftEaze also sells a kit to make this project. You can find our kit here.
Instructions
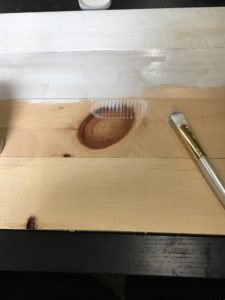
Step 1: Paint the wooden panel with the white chalk paint. You will need to apply 2 coats.
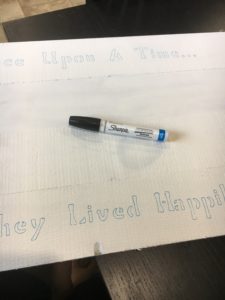
Step 2: While the chalk paint dries, determine the saying you would like on the sign. Here are a few examples for a wedding:
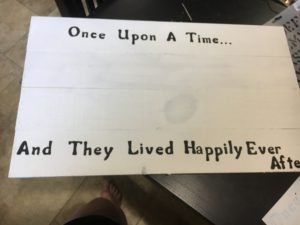
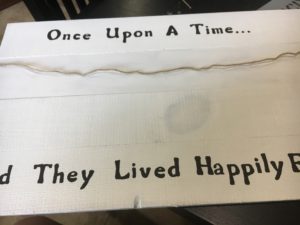
- Once upon a time… And they lived happily ever after.
- Love is patient, love is kind
- God bless the broken road, that led me to you
- If heaven wasn’t so far away.
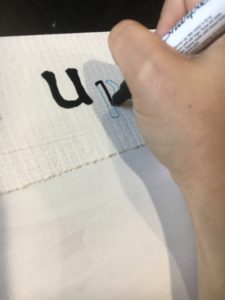
Step 3: After the paint dries, you will trace the saying onto the board using an ink pen and stencil.
Step 4: Paint inside the traced lines. You will want to connect the different parts of the letters (like the base of the L to the verticle part of the L).
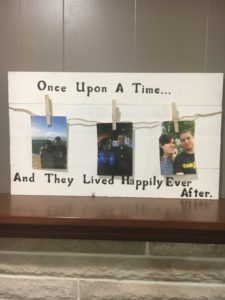
Step 5: After you finish painting the letters, allow the paint to dry. Below is what my photo signed looked like after painting the letters.
Step 6: After the paint dries, you will determine the amount of twine needed for the sign. The amount will depend on how much slack you would like. You will need several extra inches to glue the twine to the back of the sign.
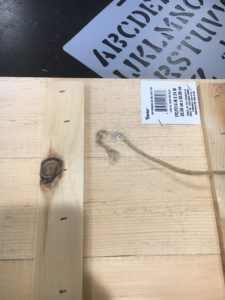
Step 7: Glue the ends of the twine to the back of the sign using the hot glue gun.
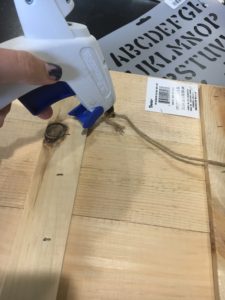
Step 8: Allow the hot glue to cool. The hot glue dot should look like the image below. You will need to hold the twine into the glue until it well joined.
Step 9: After the glue dries, you can flip it over and add the photo to the sign using the clothespins.
Hope you enjoy making this craft!