Disclosure: CraftEaze is a participant in the Amazon Services LLC Associates Program, an affiliate advertising program designed to provide a means for sites to earn advertising fees by advertising and linking to Amazon.com and affiliate sites.
I hate to tell you all this, but summer is almost over. If you watched anything on tv or listened to the radio the last week or so, then you have probably been reminded of this fact by all the “Back To School” commercials. Its the time of the year to buy your kids’ school supplies once again and for the teachers out there its time to get your classroom ready for students.
Now I don’t know about you, but I like colorful school supplies. In college, I use to buy several different color binders and notebooks for my classes. I liked each class to have a different color scheme. This helped me grab the right binder or notebook when I was quickly walking out the door. For example, one semester my Steelmaking class had a green binder while my Corrosion class used a blue binder. I had different tabs in each binder for lecture PowerPoint slides, homework, quizzes and tests, and handouts the professor would give out. I liked to have everything organized so information was easy to find and so I had a good reference for future classes.
There is one thing I really dislike in the school supply world, the black and white composition notebooks. You know the notebooks I’m talking about, but here is a picture of one.

These notebooks are so boring and dark. What exactly is the design? Is it a Rorschach test or the result of a 3-year-old throwing paint at a wall? Is there any way to make these notebooks brighter and more unique? Well, I have figured out a way to make these notebooks prettier and able to match your own personal style. Keep reading to find out how.
What You Will Need
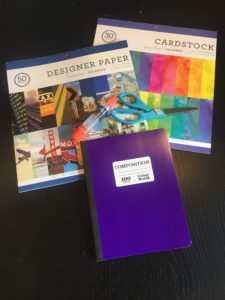
- Elmer’s Craft Bond Glue Pen
- 1 Composition Notebook
- 12″x12″ Designer Paper
- Scissors
I personally like ColorBok brand designer paper. There are so many different types of paper you can find. My personal favorite is the vintage one. There is a sheet of paper that kind of looks like an old letter. Here are a few examples of the ColorBox design paper pads:
Step By Step Instructions:
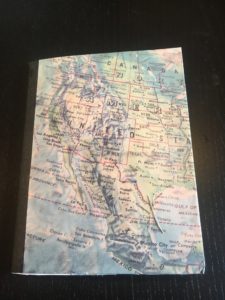
Step 1: Determine what design you would like on the outside and inside of your notebook. The ColorBok brand designer paper comes with 2 sheets of each design. I recommend you use both sheets of a design for the outside of your notebook. In this example, I selected the 2 sheets with the map of North American and blue-green marble design paper as an accent for the inside cover.
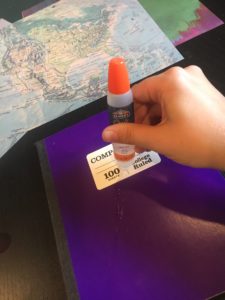
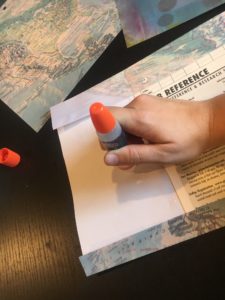
Step 2: Using the Elmer Craft Bond glue pen, apply glue to the front cover of the notebook.
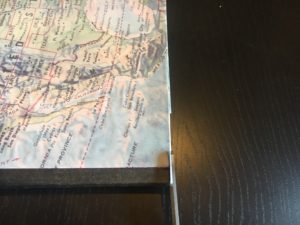
Step 3: Carefully line the first sheet of the design paper on the cover. You will want the edge of the paper to be laying next to the black fabric binding. There needs to be a paper overhang on the top and bottom. See the photo below.
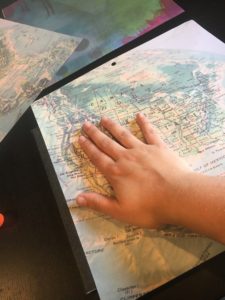
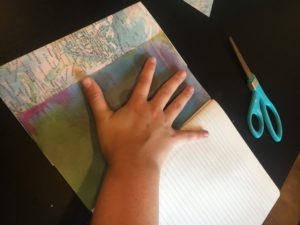
Step 4: Press the paper to ensure that the paper is bound to the notebook. Try to push out any air bubbles to ensure the cover is flat and smooth.
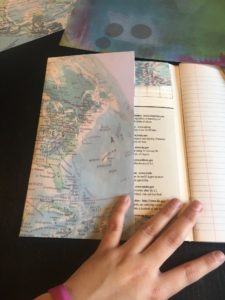
Step 5: Open up the notebook.
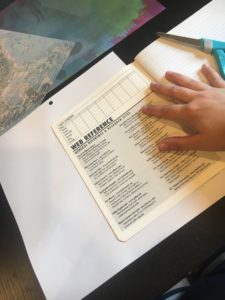
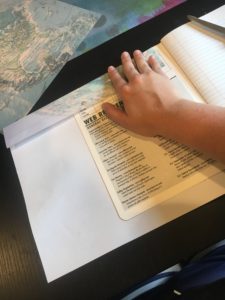
Step 6: Fold the overlay from the top and bottom over. The fold should lie right at the top and bottom of the cover (see photo below. After making the holds, you will glue the folded paper to the cover.
Step 7: Apply glue to the remaining paper that is not currently on the cover.
Step 8: Fold the section that you just glued on to the cover. Press to create a strong bond between the paper and the notebook. Try to remove any air bubbles at this time.
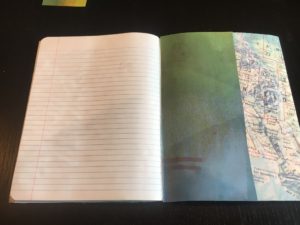
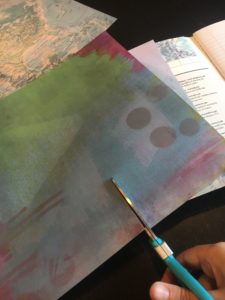
Step 9: Determine how much of the accent paper you will need for the inside cover. You can make this as big as you like. You can make it so that it covers up most of the inside cover or just the white part. I personally prefer this accent paper to take up 60-75% of the inside cover. Cut the accent paper to size.
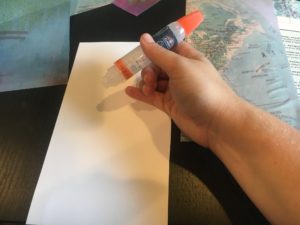
Step 10: Apply glue to the back of the accent paper.
Step 11: Apply the accent paper to the inside cover. You will want the edge of the accent paper to be right next to the first page of paper. Press to create a strong bond between the paper and the notebook. Try to remove any air bubbles at this time.
Step 12: Repeat steps 2-11 for the back cover.
Step 13: Wipe away all excess glue with a napkin.
Step 14: Place books and other heavy items on top of the notebook. This will help create a strong bond between the design paper and the composition notebook. Wait for approximately 20-30 minutes.
Step 15: Examine the notebook. If there is any excess paper visible, use scissors to cut it even.
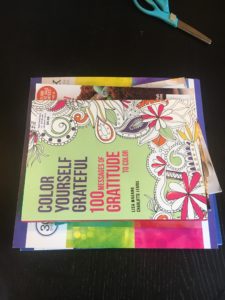
The notebook is now complete and ready for notetaking! Below are photos of the notebook that was made for this tutorial. I can’t wait to see what you all come up with!