web analytics

Wine Review – Middle Sister Moscato

Middle Sister Moscato Wine Review

Some links posted below may be affiliate links which means I’ll earn a tiny commission if you purchase through them.

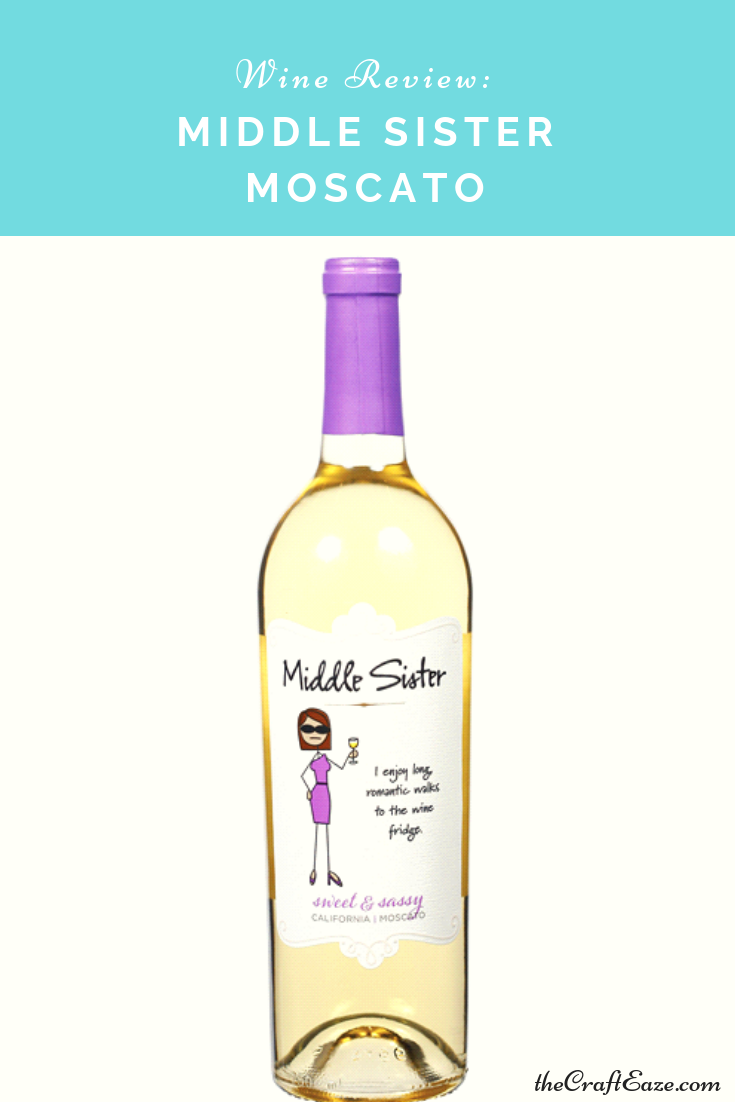
One of my favorite grocery store wine finds recently was the Middle Sister Moscato.  I had a rough week at work and my boyfriend was out of town for the weekend, so I went to the grocery store to buy a bottle of wine and food to eat so I wouldn’t have to leave the house all weekend.

As I was wondering the wine aisle, this particular bottle stood out to me. I was initially drawn to the purple metal capsule, but then I noticed the sassy looking stick figure and the name of the wine. After seeing this stick figure and that the wine was called Sweet and Sassy, I thought this is a wine I have to try!

This wine is a sweeter wine, but not too sweet. You can drink it with dessert or while crafting and watching Netflix.  It is one of my go-to Moscatos.  I think it is the perfect amount of sweet.  I can taste peach and slight pears. It smells very floral in addition to the fruit taste.  I have enjoyed this wine with a cookie and also cheese and crackers.  It is also good with spicy foods. I have had it while eating Chipotle take out and it was pretty tasty.

If you would like to try the Middle Sister Moscato, check out https://www.middlesisterwines.com/find-wines to find stores that carry it near you.  You can also purchase a bottle at Wine.com if you wanted to order from the comfort of your own home.

Be sure to check out our other wine reviews:

~Crafts, Wine, and Netflix~

DIY Beach Decor Table Decoration

Beachy Table Decoration

Disclosure: CraftEaze is a participant in the Amazon Services LLC Associates Program, an affiliate advertising program designed to provide a means for sites to earn advertising fees by advertising and linking to Amazon.com and affiliate sites.

So I have been engaged for almost a month now, and I have started thinking about what type of wedding decor we will have.  Because I have been thinking of decor, I have come up with some cool ideas that might not really work for my wedding but might work for someone else.

One idea that I came up with was a table decoration for a beach themed wedding.  Now since we live in the middle of Ohio and I grew up in the middle of Missouri a beach theme wedding doesn’t make a lot of sense for my fiance and me.  But I think it is fun to come up with decor ideas for a variety of weddings.

So I was wondering around Pat Catan’s and found this super cute votive candle holder. The candle holder (which you can see below) is the perfect combination of vintage and elegant. I thought this votive holder would look cute for a vintage/rustic wedding, but also a beach wedding.

After I found the holder, I went looking for sand and sea glass/seashells.  I decided to use two different colors of fine sand.  By using the two different colors, I felt it kinda created a look similar to a sand ceremony.  It is always cool watching a sand ceremony. I like watching as the bride and groom pour their uniquely colored sand into a vessel. As they pour the sand, the two colors create a pattern that is unique and the sand cannot be easily separated.

The CraftEaze store has a kit to make 4 of these table decorations. You can find the kit here.

Materials

Beach Table Decor Materials
Materials for Project

For this project you will need the following materials:


Instructions:

Step 1) After opening the jars of sand, start off by pouring the white sand first.

White Sand First
Pour the lighter color sand first

Step 2) After adding a layer of white sand, you will then add the accent color and.

Accent Color Sand
Add the accent color

Step 3) Alternate between the white and accent color sand until you have filled the fishbowl approximately 20%.

Layering sands
Layer the sands

Step 4) Gently shake the bowl to mix the sand.

Mix the sands together.
Gently shake the bowl.

Step 5) Press the votive candle holder into the sand.

Press votive candle holder into sand.
Add the votive candle holder.

Step 6) Add the sand glass or seashells around the candle holder.

Sea glass and seashells.
Add sea glass or seashells.

Step 7) Place the candle in the candle holder. The centerpiece is complete!

Candle
Add candle to the centerpiece.

The centerpiece is completed. You should be able to get 4 table decorations from the jars of sand.  Hope you enjoyed this project!

Happy Crafting!

Crochet Market Bag – Free Pattern

Crochet Market Bag

Disclosure: CraftEaze is a participant in the Amazon Services LLC Associates Program, an affiliate advertising program designed to provide a means for sites to earn advertising fees by advertising and linking to Amazon.com and affiliate sites.

So life has been really crazy for the last few weeks, but I am finally getting around to announcing the October CraftEaze crochet project.  The October crochet project is a market bag.

Engaged
We are engaged!

So part of the reason life has been crazy is because I recently got engaged! So the number of wedding decor kits that CraftEaze sells will more than likely increase.  Be on the lookout for new types of kits in the future.

October’s crochet CraftEaze project is for a market bag. This bag would be a good bag to keep in your car for quick after work Aldi trips. It could also be a good bag to take to the park or beach with a book, sunglasses, and sunscreen.

This bag uses an acrylic yarn that provides the bag with some stretch for purchases, but it is also strong. The yarn that is included in the CraftEaze kit creates nice blocks of different colors.  If you would like to buy a kit for this project, you can visit here.

Materials To Make Bag

Below is a list of materials that you will need to make your very own market bag.

Crochet Pattern

This pattern will use chain (ch), single crochet (sc), half double crochet (hdc), and double crochet (dc).

Chain 51.

Round 1: Sc in 2nd ch from hook. 1 sc in the next 48 ch. 2 sc in last ch. You will now work on the other side of the chain. 1 sc in the next 48 ch (102 sc). DO NOT JOIN.

Round 2-5: Sc in each sc in the row below (102 sc). Do not join.

Round 6: Sc in each sc in the row below. Join the last sc to first sc (102 sc).

Round 7: Ch 3 (counts as first dc). *Skip first sc, 1 dc in each of the next 3 sc, yo and insert hook through (extending the loop that so it reached back to position of work and does not squish the 3 dc group). Yo and draw through first two loops on hook twice (this is called a long dc).* Repeat between the ** 24 times.  Join to the top of ch 3 from the start of the row.

Round 8: Ch 1 (does not count as a stitch), 1 sc in the top of each dc. Join yarn to the first sc in the round.

Round 9-38: Repeat rounds 7 and 8 15 times.

Round 39: Sc in each sc. Do not join.

Round 40-44: Hdc in each sc around. Do not join.

Round 45: Ch 1 (does not count as a stitch). Hdc in 13 hdc. Turn.

Row 46: Ch 1 (does not count as a stitch). Hdc in the 13 hdc. Turn.

Repeat row 46 until the strap is approximately 24-30″ long.

Once the strap is approximately 24-30″ long, you will attach the strap to the opposite end of the bag. Fasten off.

You have now completed your very own market bag! Join our email list to be the first to learn about new products. Subscribe to our monthly crochet subscription box to get a project like this mailed to your door every month.

Happy Crafting!

Social Share Buttons and Icons powered by Ultimatelysocial