Disclosure: CraftEaze is a participant in the Amazon Services LLC Associates Program, an affiliate advertising program designed to provide a means for sites to earn advertising fees by advertising and linking to Amazon.com and affiliate sites.
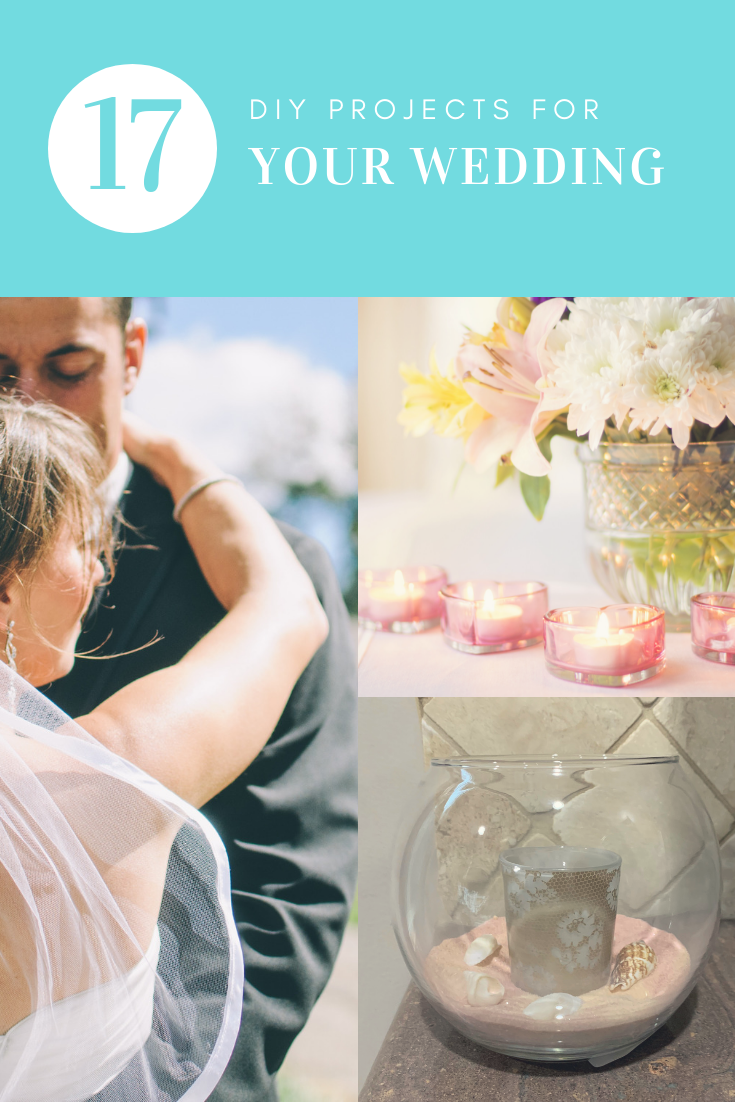
Most girls have dreamed about their wedding day since they were young. But sometimes our dream wedding is outside of our budget. Other times we want to be more involved in making the decoration. In both cases, DIY projects are the bride’s best friend. Keep in mind there are certain things that may be better left to the professionals, but there are many things that you can easily DIY.
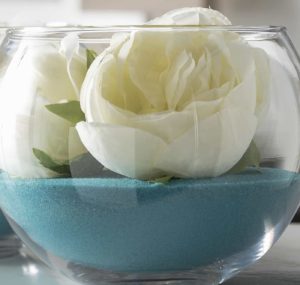
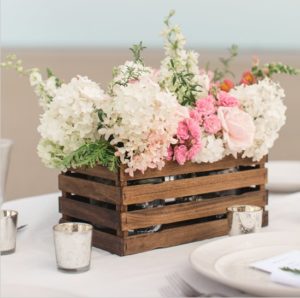
This centerpiece is so cute. It would be great for a summer wedding that is at a barn or plantation house. It would also be great for a beach or vineyard wedding. The instructions for this centerpiece can be found here. Another set of instructions can be found here.
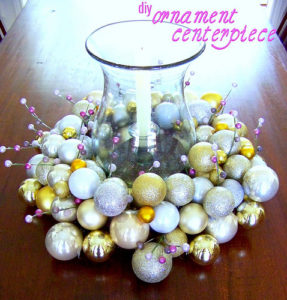
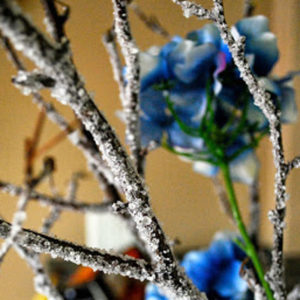
Winter weddings can make use of many Christmas decorations. This centerpiece uses the Christmas ornaments to give the table a pop of color. You can find ornaments in your wedding colors for these centerpieces. To learn how to make this centerpiece, visit https://hisugarplum.com/christmas-ornament-centerpiece/.
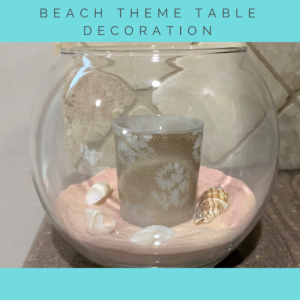
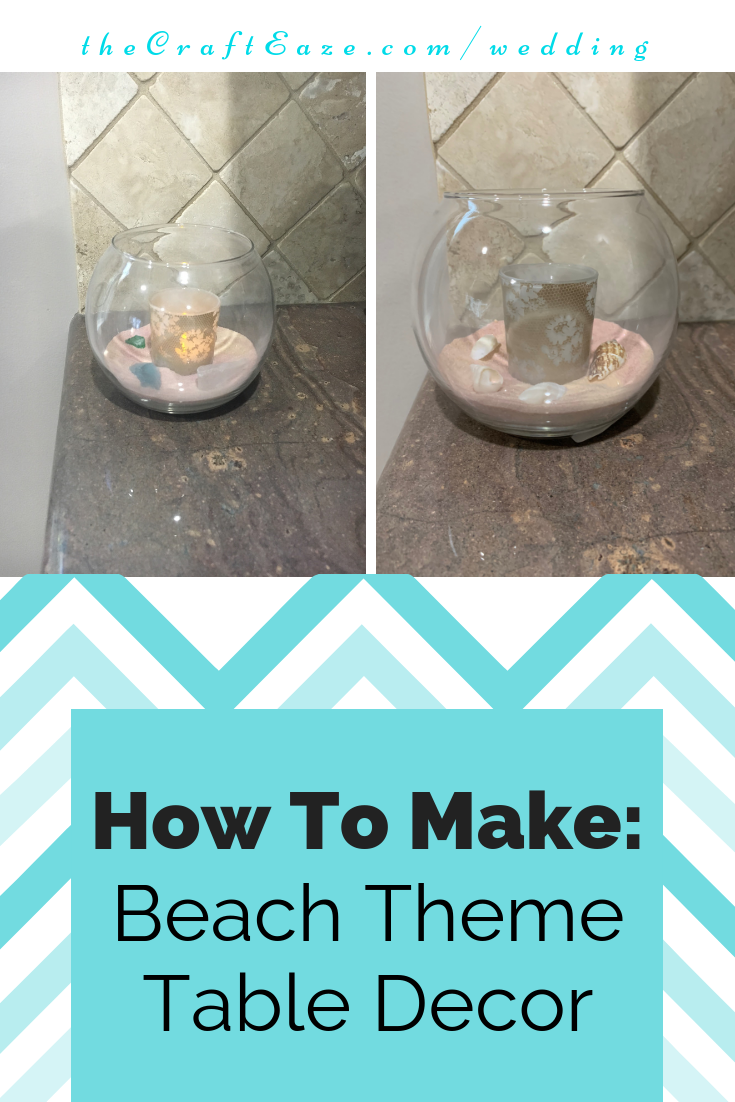
3. Beach Theme Centerpiece
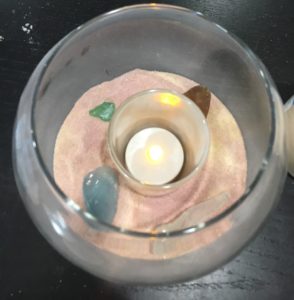
This centerpiece is perfect for a beach wedding. This centerpiece uses sand and a votive candle holder in addition to seashells or sea glass. The instructions for these centerpieces can be found here.
This is perfect for a winter wedding. It uses pinecones as an accent. The jar is frosted to look like snow. A candle is placed inside the jar which provides a soft glow to the centerpiece. You can find the instructions here.
This is another winter wedding centerpiece. Right now I am really into winter wedding centerpieces. A large reason for my sudden interest is probably because Christmas is a little over a month away. This centerpiece can give your wedding a rustic feel. You can find the instructions here.
This project is so cool! It uses paintsticks to make flower box that can be used a centerpiece, by the guestbook, or on the gift table. You can find the instructions for this project here.
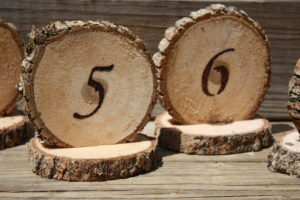
These table numbers are very easy to make and would be perfect for a rustic wedding. You can make these table number using wood slices and a fancy stencil. You will use the stencil to draw the number in the middle of the wood slice. After tracing the number from the stencil you will paint in the number using a black paint pen.
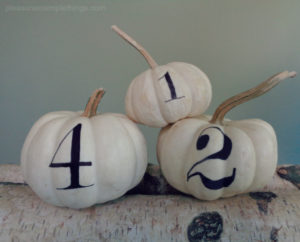
Pumpkins are the perfect decoration for fall. And these table numbers are perfect for a fall wedding. You can paint the table number (using a fancy stencil and black paint pen) on the pumpkin.
These table numbers will be a great addition to your beach wedding. The numbers can be made to be as unique as you. You can find the instructions for this project here.
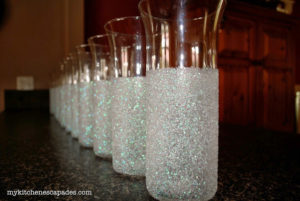
If you are planning an elegant ballroom wedding or a winter wedding, these glitter vases would be the perfect centerpiece. These vases are easy to make and only uses Mod Podge and glitter. You can find detailed instructions here.
These place cards can double as a place card and a coaster. These place cards can also give you a reason to wander down the tile aisle at Lowes or Home Depot and admire the pretty tiles that can be used to backsplashes. You can find the instructions here.
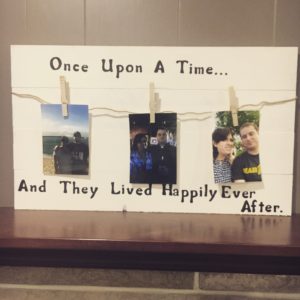
12. Wooden Photo Sign
This sign could be used for several different things at your wedding. It could be used to display the couple’s baby picture in addition to their engagement photo. Or you could also be used to contain the parents of the couple wedding picture in addition to the couples engagement photo. It could also be used as a tribute to those family members who could not attend the wedding. You can find the instructions for this project here.
13. Seashell Candles
These seashell candles would be perfect for a beach wedding. My fiancee’s cousin got married a year or so ago and had similar candles that used oyster shells instead of seashells. You can use these candles as part of a centerpiece or as a party favor.
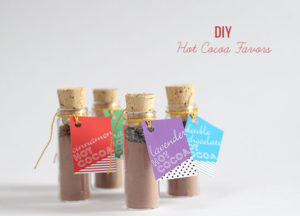
A hot cocoa wedding favor is sure to please your guests at your winter wedding. What is really fun about this project is that you can make several different types for your guest to chose from. You can also try many amazing types of hot cocoa! You can find the instructions for these DIY hot cocoa favors here.
Who doesn’t love s’mores? An s’mores kit would be the perfect wedding favor for the couple that loves bonfires or camping. Your guest would love this tasty kit. You can learn how to make these favors here.
16. Rustic Milk Can Vase
This vase would be a perfect centerpiece for a rustic wedding. The glass milk can is painted in a color to match your wedding colors. You can buy a kit to make these vases here.
Are you looking for a banner to display where you will be sitting for the night? This DIY banner is perfect for the couple’s chair. It is glittery enough to sparkle as the lights go down low for the dance. You can find the instructions to make this banner here.
Disclosure: CraftEaze is a participant in the Amazon Services LLC Associates Program, an affiliate advertising program designed to provide a means for sites to earn advertising fees by advertising and linking to Amazon.com and affiliate sites.
Fall is one of my favorite seasons. There is so much to love about fall from football to bonfires. The best part in my mind is that I can start to wear boots and scarves whenever I want!
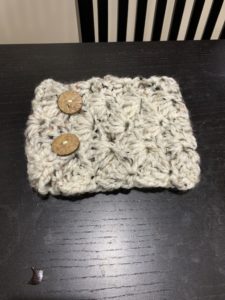
The November CraftEaze crochet box was boot cuffs which are the perfect fall accessory. This is an easy project that you can complete in a few hours just in time for Thanksgiving dinner. This is a project that you can show off to make your sister and cousins jealous when you stroll in for dinner. Thanksgiving is one of my favorite holidays. You don’t have to buy gifts for anyone and all you do is eat yummy food and watch football.
Here is finished boot cuff outside of the boot.
Here is the CraftEaze kit that will provide you with everything you would need to make this project. You can also get a printable pdf at Etsy.
Row 1: 1 sc in 2nd chain, *Skip 2 ch, 5 dc in next chain, skip 2 ch, 1 sc*, Repeat 1 time.
Row 2: Ch 3, 2 dc in first sc, skip 2 dc, 1 sc in next dc, skip 2 dc, 5 dc in sc, skip 2 dc, 1 sc in next dc, skip 2 dc, 3 dc in last sc.
Row 3: Ch 1, 1sc in the first dc, *skip 2 dc, 5 dc in sc, skip 2 dc, 1 sc in next dc*. Repeat 1 time.
Repeat Rows 2 and 3 until the cuff will fit around your leg. This will be approximately 10-12”. Weave in the yarn ends.
Finishing
You will attach 2 buttons to each cuff using scrap lightweight/medium weight yarn. Attach these buttons inside the last row that you crocheted. The 2 chain spaces in row 1 will provide the buttonholes.
Have fun making your own boot cuffs!
If you like this pattern and here are a few of our other pattern!
Disclosure: CraftEaze is a participant in the Amazon Services LLC Associates Program, an affiliate advertising program designed to provide a means for sites to earn advertising fees by advertising and linking to Amazon.com and affiliate sites.
So I have been engaged for almost a month now, and I have started thinking about what type of wedding decor we will have. Because I have been thinking of decor, I have come up with some cool ideas that might not really work for my wedding but might work for someone else.
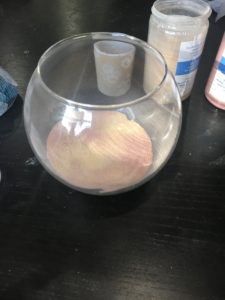
One idea that I came up with was a table decoration for a beach themed wedding. Now since we live in the middle of Ohio and I grew up in the middle of Missouri a beach theme wedding doesn’t make a lot of sense for my fiance and me. But I think it is fun to come up with decor ideas for a variety of weddings.
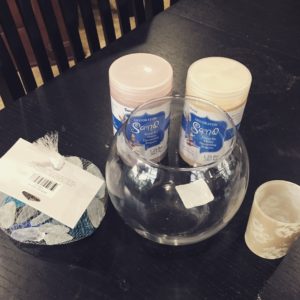
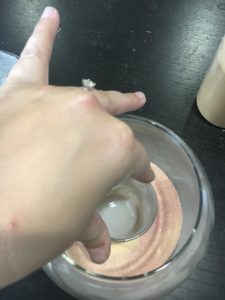
So I was wondering around Pat Catan’s and found this super cute votive candle holder. The candle holder (which you can see below) is the perfect combination of vintage and elegant. I thought this votive holder would look cute for a vintage/rustic wedding, but also a beach wedding.
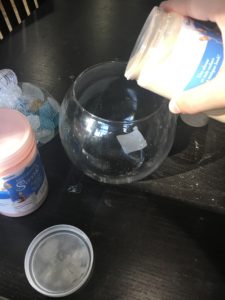
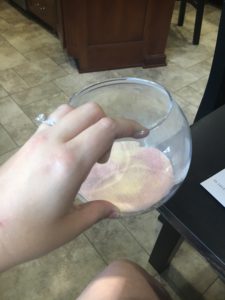
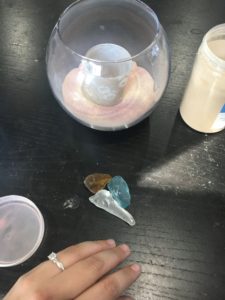
After I found the holder, I went looking for sand and sea glass/seashells. I decided to use two different colors of fine sand. By using the two different colors, I felt it kinda created a look similar to a sand ceremony. It is always cool watching a sand ceremony. I like watching as the bride and groom pour their uniquely colored sand into a vessel. As they pour the sand, the two colors create a pattern that is unique and the sand cannot be easily separated.
The CraftEaze store has a kit to make 4 of these table decorations. You can find the kit here.
Materials
Materials for Project
For this project you will need the following materials:
Disclosure: CraftEaze is a participant in the Amazon Services LLC Associates Program, an affiliate advertising program designed to provide a means for sites to earn advertising fees by advertising and linking to Amazon.com and affiliate sites.
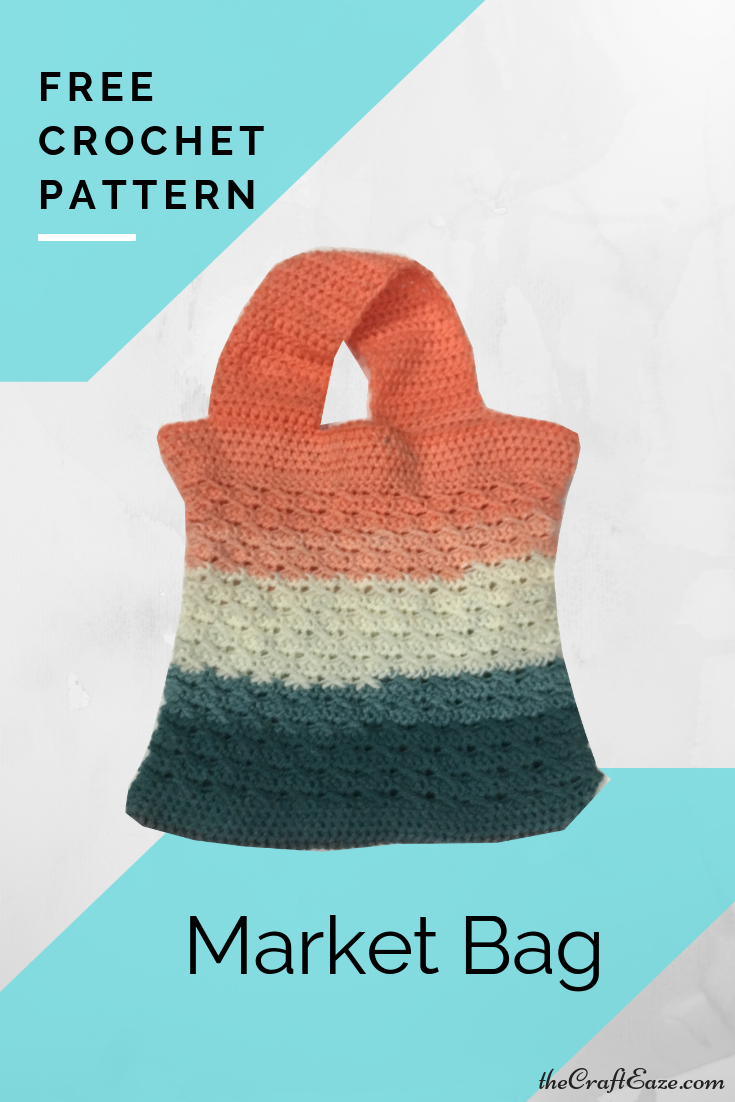
So life has been really crazy for the last few weeks, but I am finally getting around to announcing the October CraftEaze crochet project. The October crochet project is a market bag.
We are engaged!
So part of the reason life has been crazy is because I recently got engaged! So the number of wedding decor kits that CraftEaze sells will more than likely increase. Be on the lookout for new types of kits in the future.
October’s crochet CraftEaze project is for a market bag. This bag would be a good bag to keep in your car for quick after work Aldi trips. It could also be a good bag to take to the park or beach with a book, sunglasses, and sunscreen.
This bag uses an acrylic yarn that provides the bag with some stretch for purchases, but it is also strong. The yarn that is included in the CraftEaze kit creates nice blocks of different colors. If you would like to buy a kit for this project, you can visit here.
Materials To Make Bag
Below is a list of materials that you will need to make your very own market bag.
Round 1: Sc in 2nd ch from hook. 1 sc in the next 48 ch. 2 sc in last ch. You will now work on the other side of the chain. 1 sc in the next 48 ch (102 sc). DO NOT JOIN.
Round 2-5: Sc in each sc in the row below (102 sc). Do not join.
Round 6: Sc in each sc in the row below. Join the last sc to first sc (102 sc).
Round 7: Ch 3 (counts as first dc). *Skip first sc, 1 dc in each of the next 3 sc, yo and insert hook through (extending the loop that so it reached back to position of work and does not squish the 3 dc group). Yo and draw through first two loops on hook twice (this is called a long dc).* Repeat between the ** 24 times. Join to the top of ch 3 from the start of the row.
Round 8: Ch 1 (does not count as a stitch), 1 sc in the top of each dc. Join yarn to the first sc in the round.
Round 9-38: Repeat rounds 7 and 8 15 times.
Round 39: Sc in each sc. Do not join.
Round 40-44: Hdc in each sc around. Do not join.
Round 45: Ch 1 (does not count as a stitch). Hdc in 13 hdc. Turn.
Row 46: Ch 1 (does not count as a stitch). Hdc in the 13 hdc. Turn.
Repeat row 46 until the strap is approximately 24-30″ long.
Once the strap is approximately 24-30″ long, you will attach the strap to the opposite end of the bag. Fasten off.
You have now completed your very own market bag! Join our email list to be the first to learn about new products. Subscribe to our monthly crochet subscription box to get a project like this mailed to your door every month.
Crocheting and knitting is a lot of fun. You can take the most boring color of yarn and create a beautiful handmade item. These items make great gifts and products to sell, but did you know that you could also make items to donate to charity? By making an item for charity, you are not only improving your skills but you are also helping someone in need.
This post will go over 12 places that you can donate handmade items. In many cases, you can also donate money to these charities in addition to the handmade items. It is important to donate throughout the year if possible. Around the holidays, many charities receive a lot of donations, but during the summer or after the holidays the number of donations decreases significantly.
National Organizations
There are several national organizations that collect donations of crocheted and knitted items. These organizations help a variety of different people ranging from little kids with cancer to the homeless to active military and veterans. So it is fairly easy to pick an organization that is related to your particular passion. Here is a couple of national organizations that collect donations.
Project Linus
This image is from http://www.projectlinus.org/
Project Linus is an organization that provides blankets to kids who are having a rough time. There are chapters in all 50 states. The blankets that the chapter collects are given to kids around the areas at hospitals, shelters, and social service agencies. Since 1995, over 7 million blankets have been given to children all around the US. This organization also has a list of blanket patterns that are free to use. The list contains not only crochet and knitting patterns but also quilting and sewing patterns. To find a local chapter or to learn more visit: http://www.projectlinus.org/.
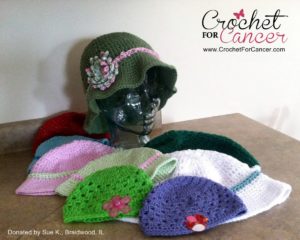
Knots of Love and Crochet for Cancer
Photo from http://www.crochetforcancer.org.
So these two organizations are very similar. Both organizations provide free hats for patients undergoing chemotherapy. Both organizations have patterns on their website that can be used to make hats. However, you are not limited to just these patterns, but they can be a good starting point.
Knots of Love not only provides hats for cancer patients but also blankets for newborn babies. This organization serves 544 hospitals in all 50 states. Since forming in 2007, over 400,000 hats and blankets have been donated. For more information, please visit http://www.knotsoflove.org/.
Crochet for Cancer is a Christian organization that has chapters in 33 states, Canada, and Australia. This organization also accepts donations of handmade teddy bears, blankets, scarves, and other items that can provide comfort to a person undergoing chemotherapy. For more information, please visit http://www.crochetforcancer.org/.
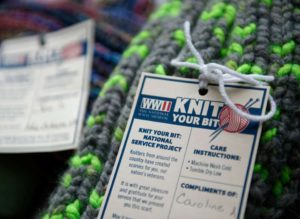
Knit Your Bit
Photo from https://www.nationalww2museum.org/
Knit Your Bit is a community outreach program at the National World War II Museum in New Orleans. This program provides veterans with handmade scarves. These scarves are handed out at veteran hospitals, veteran centers, and service organization around the country. These scarves can be knitted or crocheted in gender neutral or patriotic colors. Since 2006, over 50,000 scarves have been delivered to veterans around the country. For more information, please visit https://www.nationalww2museum.org/programs/knit-your-bit.
Warm Up America
Image from http://www.warmupamerica.org
Warm Up America is an organization that provides knitted or crocheted blankets to those in need. Some places where these blankets can be distributed include homeless shelters, women’s shelters, veteran centers, hospice, children’s hospitals, AIDS centers, and daycare centers.
What is cool about this organization is in addition to donating finished blankets and scarves, you can also donate 7″x9″ block. If you make an entire blanket, then you can use any type of stitch and make it as big as you want. There is a list of patterns that you can use to make the 7″x9″ blocks for crochet and knitting. With the blocks being smaller, you can use these blocks to learn how to do different stitches. For more information, please visit http://www.warmupamerica.org/.
Operation Gratitude
Operation Gratitude is an organization that sends care packages to military members during the cold months. Handmade scarves and hats can be donated. The scarves and hats can be made in any color, but it is suggested that the colors are more on the subtle side like blue, green, brown, grey, or maroon. This way they can be given to a male or female. For more information, please visit https://www.operationgratitude.com/.
Local Donations
There are also ways that you can donate around your local community if so choose. Like with the national organization, you can find local groups that are related to your passion. In many cases, it is best to contact these charities and centers to determine their current needs.
Nursing Homes and Hospices
Nursing homes and hospices in your local community are great places to donate crochet and knitted blankets. It is best to contact the nursing home or hospice before donating to see what exactly they need. Many times they are looking for lapghans that can use used with a wheelchair. Our September CraftEaze crochet box is an example of a lapghan that can be donated to a nursing home or hospice.
Homeless Shelters and Women’s Shelters
You can also donate blankets that you crocheted or knitted to your local homeless or women’s shelters. Like with the nursing home, you should contact the shelter before donating to see what they are needing. This way you can help provide the shelter with exactly what they need.
Local Children’s Hospital
You can also make baby items for your local children’s hospital if you don’t really have the patience or time to make an adult size blanket. Many times the local neonatal intensive care is needing hats or booties for the newborns. One of the hospitals near me (Akron Children’s Hospital) even has crochet and knit patterns for hats and booties you can make to donate. Be sure to check with your local hospital to see if there are restrictions on colors or types of yarn and how to donate items.
Pregnancy Centers
Pregnancy centers are also a good place to donate handmade baby blankets and receiving blankets. These centers provide expecting mothers with items they will need once a baby is born. If you are interested in donating to a local pregnancy center, you should contact the center to see what exactly they are needing at this moment.
Disclosure: CraftEaze is a participant in the Amazon Services LLC Associates Program, an affiliate advertising program designed to provide a means for sites to earn advertising fees by advertising and linking to Amazon.com and affiliate sites.
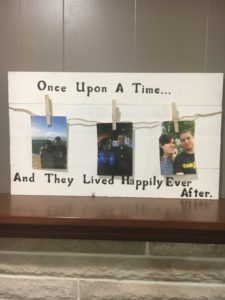
Are you looking for a cool way to display photos at your wedding? Or even for an easy DIY project to hang up photos of your kids? If so, look no further then this project. In this post, I will teach you how to make a wooden photo sign. If you like this project, then be sure to check out our other how-to posts (Wooden Wedding Sign and Unique Notebook).
CraftEaze also sells a kit to make this project. You can find our kit here.
Instructions
Step 1: Paint the wooden panel with the white chalk paint. You will need to apply 2 coats.
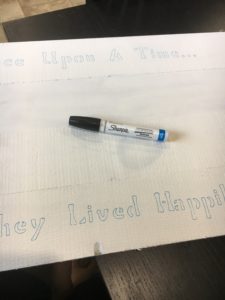
Step 2: While the chalk paint dries, determine the saying you would like on the sign. Here are a few examples for a wedding:
Once upon a time… And they lived happily ever after.
Love is patient, love is kind
God bless the broken road, that led me to you
If heaven wasn’t so far away.
Step 3: After the paint dries, you will trace the saying onto the board using an ink pen and stencil.
This is what the sign should look like after tracing the saying.
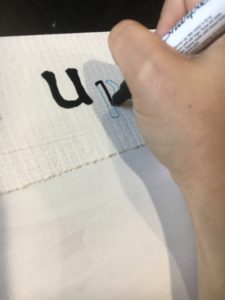
Step 4: Paint inside the traced lines. You will want to connect the different parts of the letters (like the base of the L to the verticle part of the L).
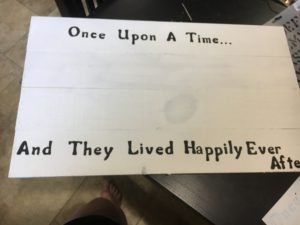
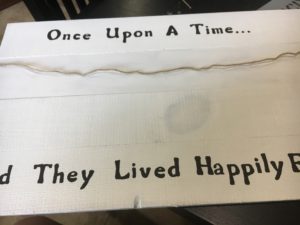
Step 5: After you finish painting the letters, allow the paint to dry. Below is what my photo signed looked like after painting the letters.
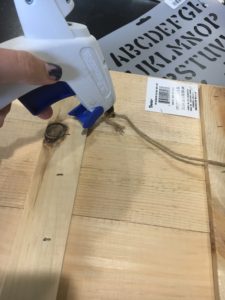
Step 6: After the paint dries, you will determine the amount of twine needed for the sign. The amount will depend on how much slack you would like. You will need several extra inches to glue the twine to the back of the sign.
Step 7: Glue the ends of the twine to the back of the sign using the hot glue gun.
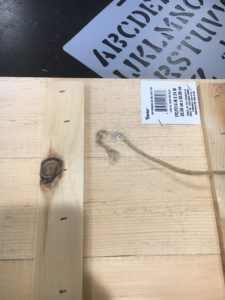
Step 8: Allow the hot glue to cool. The hot glue dot should look like the image below. You will need to hold the twine into the glue until it well joined.
Step 9: After the glue dries, you can flip it over and add the photo to the sign using the clothespins.
Disclosure: CraftEaze is a participant in the Amazon Services LLC Associates Program, an affiliate advertising program designed to provide a means for sites to earn advertising fees by advertising and linking to Amazon.com and affiliate sites.
I hate to tell you all this, but summer is almost over. If you watched anything on tv or listened to the radio the last week or so, then you have probably been reminded of this fact by all the “Back To School” commercials. Its the time of the year to buy your kids’ school supplies once again and for the teachers out there its time to get your classroom ready for students.
Now I don’t know about you, but I like colorful school supplies. In college, I use to buy several different color binders and notebooks for my classes. I liked each class to have a different color scheme. This helped me grab the right binder or notebook when I was quickly walking out the door. For example, one semester my Steelmaking class had a green binder while my Corrosion class used a blue binder. I had different tabs in each binder for lecture PowerPoint slides, homework, quizzes and tests, and handouts the professor would give out. I liked to have everything organized so information was easy to find and so I had a good reference for future classes.
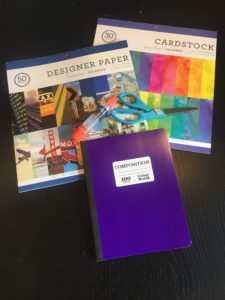
There is one thing I really dislike in the school supply world, the black and white composition notebooks. You know the notebooks I’m talking about, but here is a picture of one.
Example of a boring composition book
These notebooks are so boring and dark. What exactly is the design? Is it a Rorschach test or the result of a 3-year-old throwing paint at a wall? Is there any way to make these notebooks brighter and more unique? Well, I have figured out a way to make these notebooks prettier and able to match your own personal style. Keep reading to find out how.
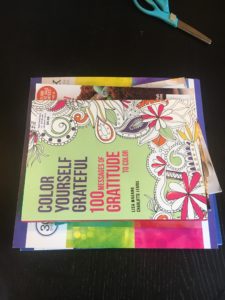
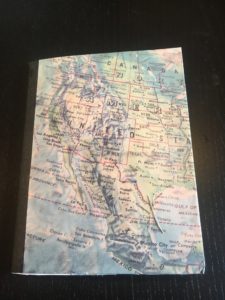
I personally like ColorBok brand designer paper. There are so many different types of paper you can find. My personal favorite is the vintage one. There is a sheet of paper that kind of looks like an old letter. Here are a few examples of the ColorBox design paper pads:
Step By Step Instructions:
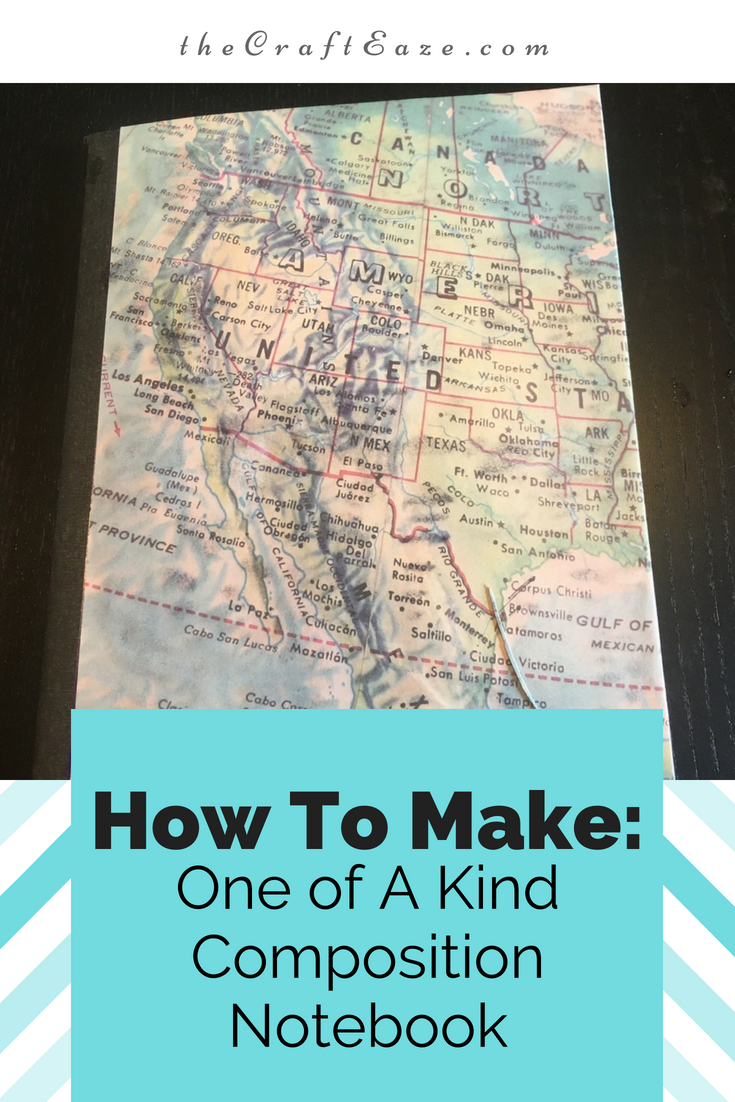
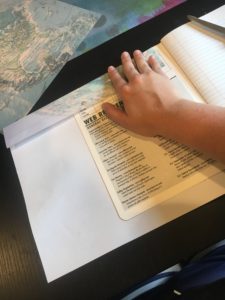
Step 1: Determine what design you would like on the outside and inside of your notebook. The ColorBok brand designer paper comes with 2 sheets of each design. I recommend you use both sheets of a design for the outside of your notebook. In this example, I selected the 2 sheets with the map of North American and blue-green marble design paper as an accent for the inside cover.
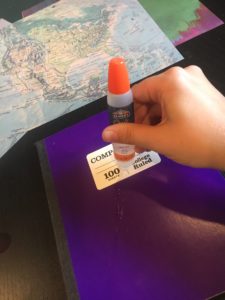
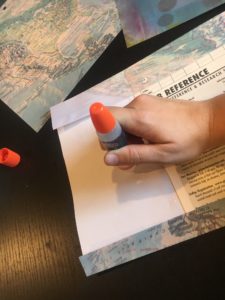
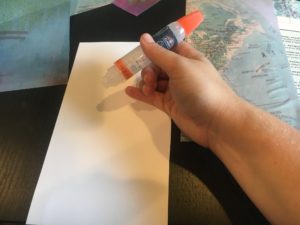
Step 2: Using the Elmer Craft Bond glue pen, apply glue to the front cover of the notebook.
Apply the glue to the cover.
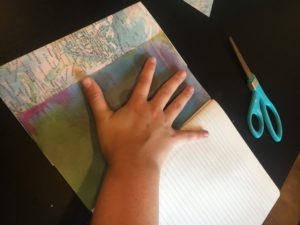
Step 3: Carefully line the first sheet of the design paper on the cover. You will want the edge of the paper to be laying next to the black fabric binding. There needs to be a paper overhang on the top and bottom. See the photo below.
Lay the paper so there is a slight overhang on the top and bottom of the notebook and the edge is laying right next to the black fabric.
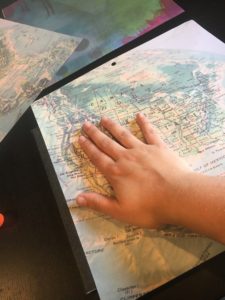
Step 4: Press the paper to ensure that the paper is bound to the notebook. Try to push out any air bubbles to ensure the cover is flat and smooth.
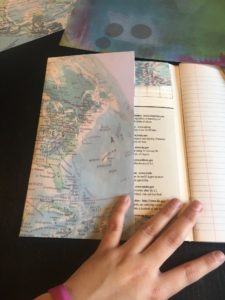
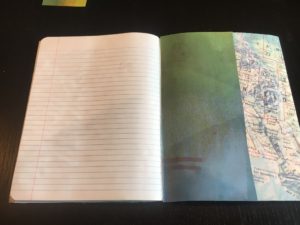
Step 5: Open up the notebook.
What the notebook looks like after opening.
Step 6: Fold the overlay from the top and bottom over. The fold should lie right at the top and bottom of the cover (see photo below. After making the holds, you will glue the folded paper to the cover.
Hold the top and bottom extra paper.
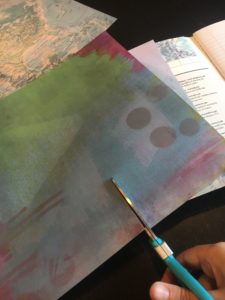
Step 7: Apply glue to the remaining paper that is not currently on the cover.
Apply glue to the remaining paper.
Step 8: Fold the section that you just glued on to the cover. Press to create a strong bond between the paper and the notebook. Try to remove any air bubbles at this time.
Hold the remaining paper to the cover.
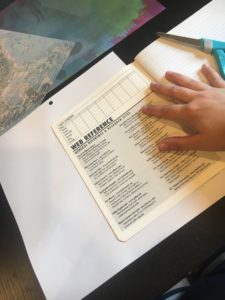
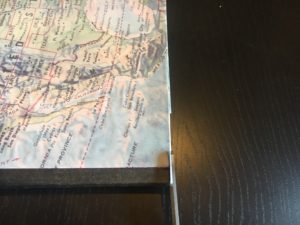
Step 9: Determine how much of the accent paper you will need for the inside cover. You can make this as big as you like. You can make it so that it covers up most of the inside cover or just the white part. I personally prefer this accent paper to take up 60-75% of the inside cover. Cut the accent paper to size.
Cut the accent paper.
Step 10: Apply glue to the back of the accent paper.
Apply glue to the accent paper.
Step 11: Apply the accent paper to the inside cover. You will want the edge of the accent paper to be right next to the first page of paper. Press to create a strong bond between the paper and the notebook. Try to remove any air bubbles at this time.
Place paper on the inside cover.
Step 12: Repeat steps 2-11 for the back cover.
Step 13: Wipe away all excess glue with a napkin.
Step 14: Place books and other heavy items on top of the notebook. This will help create a strong bond between the design paper and the composition notebook. Wait for approximately 20-30 minutes.
Place heavy objects on top of the notebook and allow the glue to dry.
Step 15: Examine the notebook. If there is any excess paper visible, use scissors to cut it even.
Cut off excess paper.
The notebook is now complete and ready for notetaking! Below are photos of the notebook that was made for this tutorial. I can’t wait to see what you all come up with!
Disclosure: CraftEaze is a participant in the Amazon Services LLC Associates Program, an affiliate advertising program designed to provide a means for sites to earn advertising fees by advertising and linking to Amazon.com and affiliate sites.
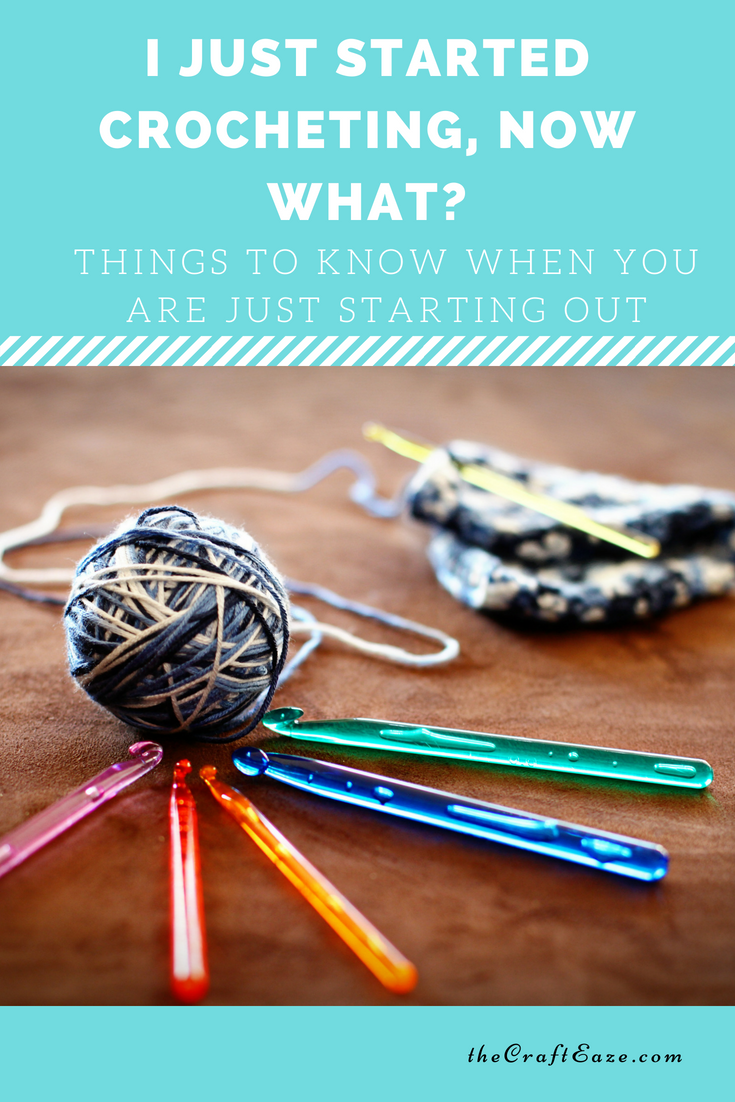
So you recently started to learn how to crochet, but what is the next step? Maybe you are confused by all of the abbreviations that are basically another language. Maybe you have spent way too much time trying to figure out how to make a double crochet. Or maybe you are tired of making scarfs for everyone in your family. Well, this is the post for you!
In this post, I will go over some of the most common abbreviations used in crochet patterns. I will go over the different types of yarn (weights and materials). I will show you how to perform some of the basic stitches. At the end of the post, I will provide you with some of my favorite places to find crochet patterns/projects.
Crochet Dictionary
The abbreviations that are used in crochet patterns can be overwhelming to a person who is new to crocheting. However, over time you will start to read a crochet pattern fluently without having to look up the abbreviations. The list below contains common abbreviations. This list is in alphabetical order. These abbreviations are a good foundation for most crochet projects. If you master these abbreviations, then you should be able to read most patterns.
* * = repeat instructions between asterisks as many times as directed
BL = back loop only
CC = contrasting color
ch = chain
dc = double crochet
dec = decrease
fl = front loop only
gauge = the number of stitches per inch and rows per inch that result from a specified yarn worked with a specified-size hook.
hdc = half double crochet
inc = increase
MC = main color
RS = right side
sc = single crochet
sc/dc/tr2tog = single/double/triple crochet 2 together
sl st = slip stitch
sp = space
tr = triple crochet
WS = wrong side
yo = yarn over
All About Yarn
Yarn can be bought in many different weights, colors, and fibers. Weight is the thickness of the yarn. The larger the number the thicker the yarn. So a yarn with a weight of 3 is thicker than a yarn with a weight of 0. The weight of the yarn can also be used to determine what the best hook to use. A thicker yarn with a weight of 6 will use a very large hook like M/13 (9 mm), whereas a yarn with a weight of 4 will use a hook that is slightly smaller like an I/9 (5.5 mm).
When you are shopping for yarn, you can find many different fibers. Fibers are what the yarn is made of. There are different synthetic and natural yarns. Most beginners start crocheting using acrylic yarn. Acrylic yarn is made from a polymer (Material Science to the rescue!). Acrylic yarn is relatively cheap and is produced by a variety of different companies. Acrylic yarn sometimes gets a bad rap because it can be itchy and uncomfortable to work with. However, this is not true for all acrylic yarn and an unfortunate myth. Cotton yarn is used to make garments. It can be bought in many different weights. What I like about cotton yarn is that it is lightweight and very durable. Wool is also a common yarn fiber. Wool is made from the wool of sheep, llamas, or alpacas. Wool yarn is a warm fiber that is used to make scarves, sweaters, and other autumn/winter clothing items. There are many different types of wool including merino, cashmere, mohair, angora, or alpaca. You can also buy blends that contain two or more fibers like an acrylic and cotton blend. These blends are used to make the yarn stronger, improve the washability of the yarn, and even change the appearance of the yarn.
I have been crocheting for several years now, and have found different yarns that I enjoy to work with. I like to use the bulky yarn for projects because you can see the progress of the project easily. However, I really like the bright colors that are found in the lightweight baby yarns. Here are some of my favorite yarns to work with for each weight.
Weight 0 – Lace
Aunt Lydia’s Crochet Thread – So this crochet thread is perfect to make lace with. I have used it to make nameplates in the past that I have used on my fireplace mantle. I have also used it to make a wall hanging that put in a frame for my grandparents. This crochet thread is made from cotton and comes in a variety of different colors ranging from white to black to purple to red.
Weight 1 – Super Fine
Red Heart It’s A Wrap – So I have to be honest, but I have never used a super fine weight yarn before. However, every time I go to Joann or Micheal’s I pick up this yarn and almost buy this particular yarn. I don’t really have a project in mind for this yarn, so I always talk myself out of buying it. I love the colors this yarn is available in and that it is a cake which makes cool color changes. I also like the fact it is a cotton and acrylic blend. So it will be easy to wash and work with. This will be the yarn I use when I finally try to make my first project using a super fine yarn.
Weight 2 – Fine
Sugar Bush Itty Bitty Yarn – So I am using this yarn to make a lightweight summer vest. This vest pattern has many small openings and this yarn is perfect to make the designs. The yarn is great for clothing because it is a blend of merino wool, cashmere, and nylon.
Weight 3 – Light
Lion Brand Baby Soft Yarn– I love using this yarn to make baby blankets! I make a lot of baby blankets because many of my friends are having babies and my mom’s friends are having grandbabies. This yarn is an acrylic and polyamide blend. Both of these fibers are synthetic fibers, so the yarn is machine washable which is very important for a baby blanket. The yarn comes in many different colors that are perfect for baby blankets.
Weight 4 – Medium
Red Heart Boutique Unforgettable – So I am going to cheat a little on this weight and give you two of my favorite yarns. The first one is the Red Heart Boutique Unforgettable yarn. I have used this yarn several times in the past to make scarves for gifts, to sell, and even to wear myself. This yarn is 100% acrylic. I love the color combinations available and it is also fairly soft. There are fairly long color sections that make this yarn self-striping.
Caron Simply Soft – This is my go-to yarn for most projects. I have made blankets, baby hats, adult hats, headbands, and a sweater from this yarn. This yarn is an acrylic yarn, but it is so soft. It is easy to work with and is available in many bright colors and even variegated yarns. Most recently, I have been using this yarn to make an argyle scarf using the Paint and Camo colors.
Weight 5 – Bulky
Bernat Maker Home Dec Yarn– This is a fun yarn to work with to make pillows and other home decor items. I have also used this yarn to make a market bag. This is a tubular yarn that contains a cotton shell with nylon filling. The yarn is available in bright and modern colors. It is easy to work with and is very soft. I have created a couple of crochet patterns that use this yarn for throw pillows. You can find some of these patterns at our Etsy shop (www.etsy.com/shop/CraftEazePatterns).
Weight 6 – Super Bulky
Bernat Blanket/Baby Blanket Yarn– So I like to work with super bulky yarns, and as a result, I’m going to provide you with my two favorite super bulky yarns. The first one is the Bernat Blanket and Baby Blanket yarn. This yarn is very soft and warm. The yarn is made from polyester. If it is used to make a baby blanket, it can is so soft and thick that it will make a great blanket for tummy time. I made my dad a blanket using the blanket yarn, and he said it is so soft and warm.
Lion Brand Hometown USA Yarn– I have used this yarn in the past to make winter hats and a Katniss cowl for my sister. This yarn is acrylic yarn. It is soft and each color has a US city in the name like New York White and Cincinnati Red. Another cool feature for this yarn is that its made in the USA.
Learning the Basics
So there are a handful of stitches that are the bases of almost every pattern. If you can master these stitches, then you should have the background to work on many projects and patterns. In this section, I will give you the steps to make the chain followed by a video tutorial. The stitches will progressively get taller as you go along. At the end of the post, there will be a video to show you how to make a magic circle which can be used if you are crocheting in a round.
Chain Stitch
The chain stitch is the first stitch that you will learn. This is because you make a foundation chain to start a project. Steps 1-2 are used to start the foundation chain only (aka the first chain of a project).
Make a slip knot and place it on the hook. Wrap the yarn around the hook (yarn over hook).
With the yarn at the tip of the hook draw the loop through the loop on the hook. This makes the first chain.
Repeat, yarn over (yo) and pull this loop through the loop on the hook until you have the desired number of chains.
Slip Stitch
The slip stitch can be used in a chain stitch or a row stitch (aka single crochet/double crochet/etc.). In the written instructions, the row stitch instruction will be in the paratheses. The slip stitch can be used when you are working in a round, joining a new color, to make a trim, or to invisibly move to another part of a row.
Insert hook into the chain (under top 2 loops).
Yarn over (yo) and pull through chain (stitch) and loop on the hook in one motion.
Single Crochet
The single crochet (sc) is one of the most commonly used stitches in crochet patterns. The single crochet is considered a row stitch. This stitch can be used in a chain and in a row stitch.
Foundation Chain Sc
Insert hook into the second chain.
Yarn over (yo) and pull through both loops on the hook.
Insert hook into the next chain.
Yo and pull through both loops on the hook.
Repeat steps 3 and 4 the desired number of times.
Row Sc
To start the row, chain 1.
Insert the hook front to back of the top two loops of the first stitch of the row below.
Yo and pull through the stitch.
Yo and pull through both loops on the hook.
Repeat steps 2-4 the desired number of times.
Half Double Crochet
The half double crochet (hdc) is the third shortest stitch after the slip stitch and single crochet. The half double crochet is considered a row stitch. This stitch can be used in a chain and in a row stitch.
Foundation Chain hdc
Yarn over and insert hook into the third chain.
Yarn over (yo) and pull through all three loops on the hook.
Yarn over and insert hook into the next chain.
Yo and pull through the three loops on the hook.
Repeat steps 3 and 4 the desired number of times.
Row hdc
To start the row, chain 2.
Yarn over, and insert the hook front to back of the top two loops of the first stitch of the row below.
Yo and pull through the stitch and loops on the hook.
Repeat steps 2-3 the desired number of times.
Double Crochet
The double crochet (dc) is the second tallest stitch after the triple crochet, that I will go over in this post. The double crochet is considered a row stitch. This stitch can be used in a chain and in a row stitch.
Foundation Chain dc
Yarn over (yo) and insert hook into the fourth chain.
Yo and pull through the chain.
Yo and draw through first 2 loops.
Yo and draw through the remaining 2 loops.
Yo and insert hook into the next chain.
Repeat steps 2 through 5 until desired stitches are made.
Row dc
To start the row, chain 3.
Yarn over, and insert the hook front to back of the top two loops of the first stitch of the row below.
Yo and pull through the stitch.
Yo and pull through the first 2 loops.
Yo and draw through remaining 2 loops.
Repeat steps 2-4 the desired number of times.
Triple/Treble Crochet
The triple/treble crochet (tr) is the tallest stitch that I will go over in this post. The triple/treble crochet is considered a row stitch. This stitch can be used in a chain and in a row stitch. This stitch is called a triple crochet in the United States but it is called a treble crochet elsewhere.
Foundation Chain tr
Yarn over (yo) twice and insert hook into the fifth chain.
Yo and pull through the chain.
Yo and draw through first 2 loops.
Yo and draw through the next 2 loops.
Yo and draw through the remaining 2 loops.
Yo twice and insert hook into the next chain.
Repeat steps 2 through 5 until desired stitches are made.
Row tr
To start the row, chain 4.
Yo twice, and insert the hook front to back of the top two loops of the first stitch of the row below.
Yo and pull through the stitch.
Yo and pull through the first 2 loops.
Yo and draw through remaining 2 loops.
Repeat steps 2-4 the desired number of times.
Magic Circle
A magic circle is sometimes used when crocheting in a round. I have used a magic circle to make hats and stuffed animals. In my opinion, a video is the best way to learn how to do this stitch. The video below is one that I have used several times when trying to remember how to make a magic circle.
Favorite Places to Find Patterns or Ideas
So now that you have learned the basics, its time to find some cool patterns. There are so many places where you can find projects, but here are some of my favorite places.
Books
So one place I have found projects is through books. Here is a list of books that I have used in the past to find projects.
So I was wondering around Barnes and Nobles one day after I moved to Ohio and came across this book. Several of the projects are super cute and it is also a great book for beginners. There is step by step directions of how to make certain stitches with pictures. I have made several patterns in the book including a bag, sweater, and shawl.
This is the first book I bought to help teach myself how to crochet. The cool thing about this book is that it comes with hooks. This is obviously a great book for beginners who are learning the art. The patterns progressively get hard as the book goes along. Even though this book is for beginners there are some great blanket patterns inside.
I received this book for my birthday one year. This book is a great resource. There are so many instructions to make different types of trims and stitches, but it also contains some cool pattern that varies in skill level.
Online
You can find many crochet patterns online. Some of these patterns are free, while others you have to buy.
Ravelry (www.ravelry.com/account/login) is a social network for people who do yarn art. There are so many patterns available on Ravelry. The search feature is very nice because you can search based on a variety of different parameters. If you know you want to make a scarf, you can search for a scarf but also include other parameters such as hook size, skill level, amount of yarn, or even if its free or a paid pattern. You can also post your completed projects in Ravelry, join groups, find local crochet groups, and comment on other crocheter’s projects.
Pinterest (www.pinterest.com/) is one of the most popular social networks. But did you know that you can use Pinterest to find crochet patterns? There are so many patterns available on Pinterest, so there is no limit on what patterns and projects you can find.
Our subscription crochet box will send a project to your door every month.
Our website (theCraftEaze.com) is another resource to find new projects. What’s special about CraftEaze, is that we have a subscription service which will send you a new project monthly. The subscription service contains all materials needed to make a particular project in addition to a Netflix and wine suggestion. It also provides access to a private Facebook group which is like an online craft group. You can sign up for our subscription service at thecrafteaze.com/Subscription. Each month, we have a Facebook live video revealing this month’s project. We talk about the materials that are included in the CraftEaze box, the wine suggestion, and the Netflix suggestion.
CraftEaze also sells individual projects that were featured in each month’s CraftEaze box. These projects are well suited for beginners. We provide tutorials for any stitched used in the project. You can find a list of past projects at thecrafteaze.com/individual_projects.
I hope you enjoy learning how to crochet and making new projects!
Disclosure: CraftEaze is a participant in the Amazon Services LLC Associates Program, an affiliate advertising program designed to provide a means for sites to earn advertising fees by advertising and linking to Amazon.com and affiliate sites.
So if you are like me, I bet you have probably been scanning Pinterest for the last several years. I bet you have scanned it while watching tv, eating lunch alone when you’re supposed to be working, or even when you are trying to avoid an awkward conversation with an acquaintance who you may not be very fond of. I have scanned Pinterest for recipes, craft ideas, and home decor ideas. However, I have to say one of the things I have spent a lot of time on Pinterest looking at is things related to weddings. Even when I was not dating someone, I spent a lot of time looking at ideas for wedding decor, table settings, bouquets, and the best readings for a Catholic wedding. It is fun to daydream what my future wedding would be like or even try to guess how much a Pinterest wedding would cost.
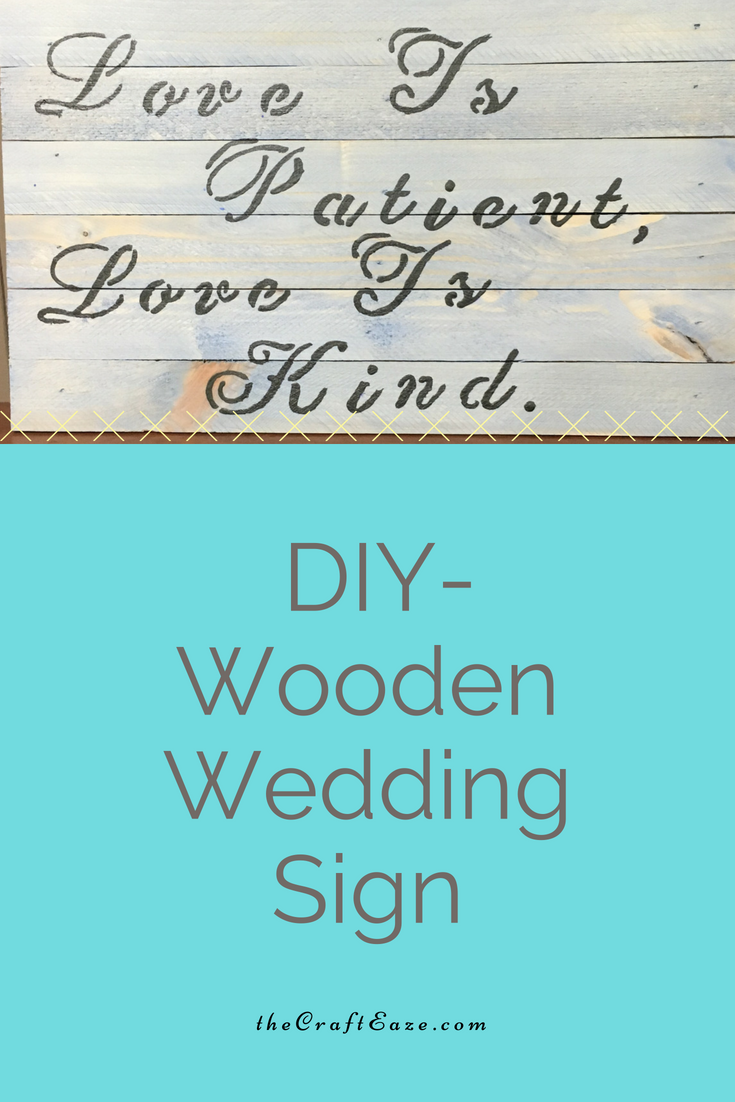
One of the wedding trends on Pinterest that I think can be very elegant (if done correctly) is the rustic wedding. I like that it gives a new life to old things with a modern twist. It is also great for brides on a budget because it can be DIY or even use things you find at a garage sale. One item that seems always pops up in the rustic wedding pins is the wooden sign. These signs can have a variety of different things written on them. Pinterest has wooden signs with love quotes like “Love is Patient, Love is Kind”, signs with important dates (like their first date, proposal date, and wedding date), signs pointed to the gift table/cake table, or even signs with signature drinks listed on them.
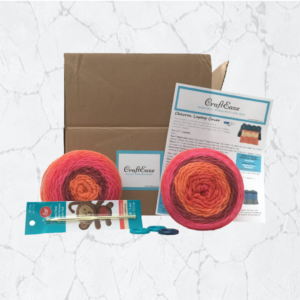
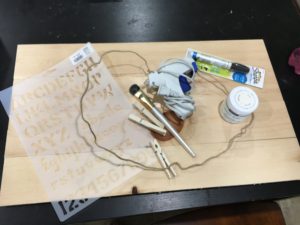
This post will go over the steps to make an awesome wooden sign. You can use this sign at your amazing wedding, but you can also make a sign to hang in your home. One jar of pickling wash and 2 oz bottle of acrylic paint can be used to make multiple signs. You can buy a kit at our store here.
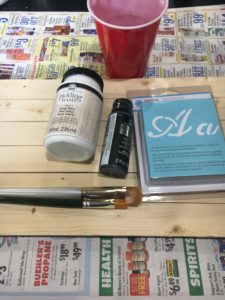
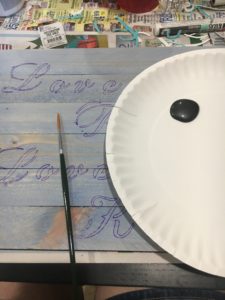
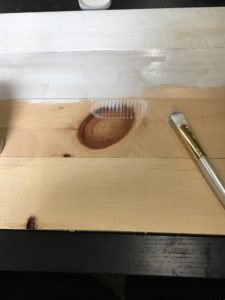
Step 1) Put down a newspaper to prepare your work area.
Step 2) Apply the pickling wash to the board. Let the pickling wash soak in for about 30 seconds and then wipe away the excess wash. You will need to apply at least 2 coats.
Step 3) Wait about 30 minutes to 1 hour for the board to be dry to the touch. During this time you can figure out what you would like to put on the sign.
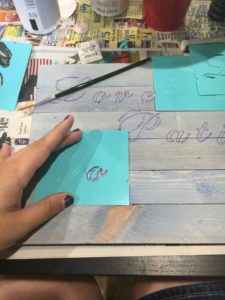
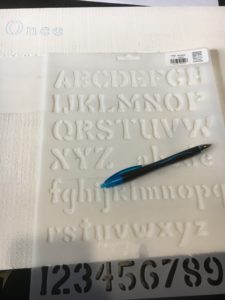
Step 4) Using the stencil kit, ruler, and ink pen/pencil trace out the phrase that you would like on the sign.
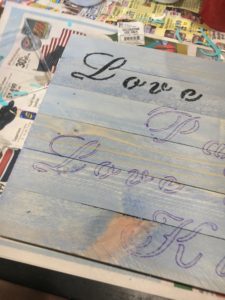
Using the stencil kit, ink pen, and ruler trace the quote.
Once the lettering is done, you will start to paint the lettering.
Step 5) You will need to paint inside the marks on the boards with the small paintbrush. Try to carefully cover up the marks. However, don’t worry if there is still a little bit of the pen/pencil marks showing. These small marks will be difficult if not impossible to see.
Paint between the pen/pencil marks with the black paint and small brush.
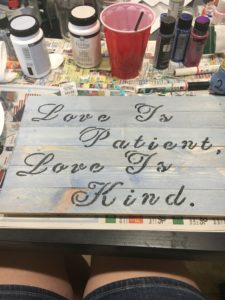
Step 6) Allow for the acrylic paint to dry. After it drys it is ready to be displayed.
It’s time to let your finished creation dry!
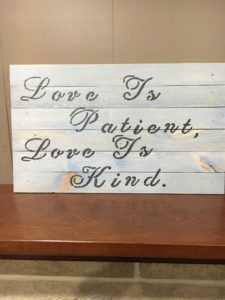
Here is my finished creation sitting on my fireplace. Hope you have fun making this sign.


 Stitch ‘n Bitch Crochet – The Happy Hooker
 I Taught Myself Crochet
 Crochet – The Complete Step By Step Guide