Disclosure: CraftEaze is a participant in the Amazon Services LLC Associates Program, an affiliate advertising program designed to provide a means for sites to earn advertising fees by advertising and linking to Amazon.com and affiliate sites.
I hate to tell you all this, but summer is almost over. If you watched anything on tv or listened to the radio the last week or so, then you have probably been reminded of this fact by all the “Back To School” commercials. Its the time of the year to buy your kids’ school supplies once again and for the teachers out there its time to get your classroom ready for students.
Now I don’t know about you, but I like colorful school supplies. In college, I use to buy several different color binders and notebooks for my classes. I liked each class to have a different color scheme. This helped me grab the right binder or notebook when I was quickly walking out the door. For example, one semester my Steelmaking class had a green binder while my Corrosion class used a blue binder. I had different tabs in each binder for lecture PowerPoint slides, homework, quizzes and tests, and handouts the professor would give out. I liked to have everything organized so information was easy to find and so I had a good reference for future classes.
There is one thing I really dislike in the school supply world, the black and white composition notebooks. You know the notebooks I’m talking about, but here is a picture of one.
Example of a boring composition book
These notebooks are so boring and dark. What exactly is the design? Is it a Rorschach test or the result of a 3-year-old throwing paint at a wall? Is there any way to make these notebooks brighter and more unique? Well, I have figured out a way to make these notebooks prettier and able to match your own personal style. Keep reading to find out how.
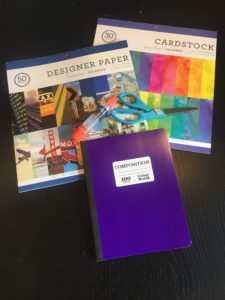
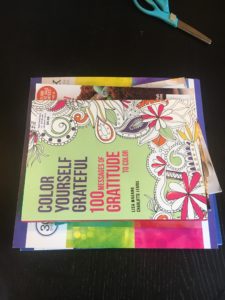
I personally like ColorBok brand designer paper. There are so many different types of paper you can find. My personal favorite is the vintage one. There is a sheet of paper that kind of looks like an old letter. Here are a few examples of the ColorBox design paper pads:
Step By Step Instructions:
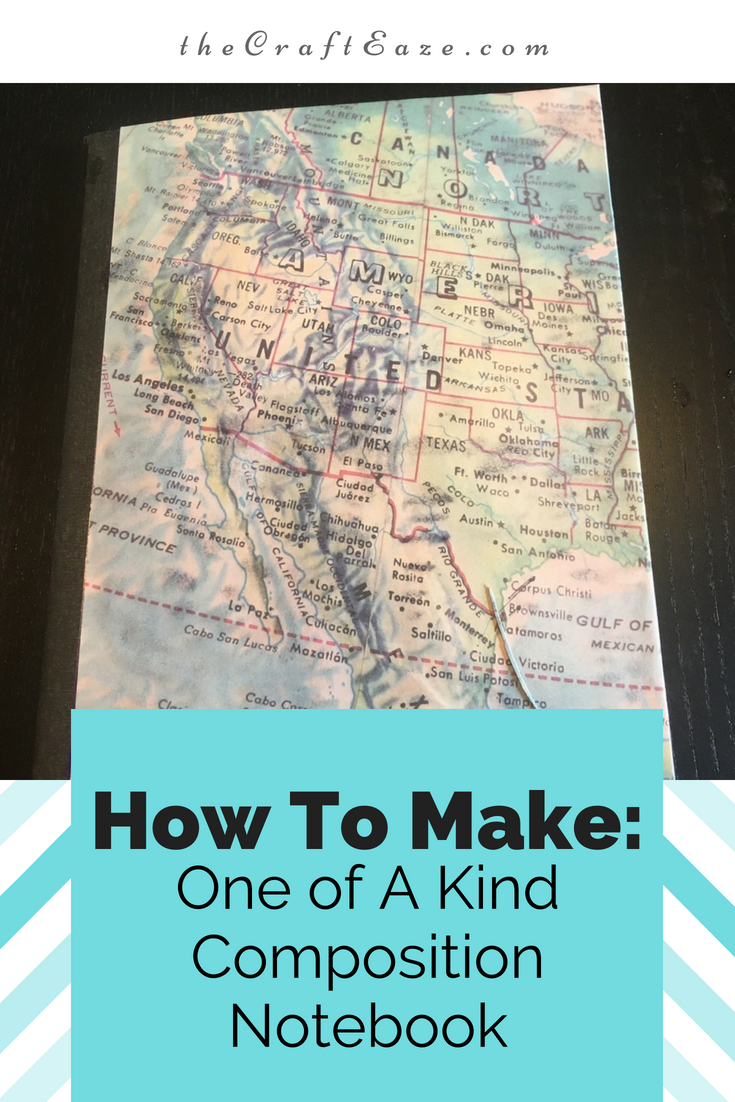
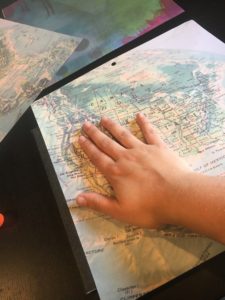
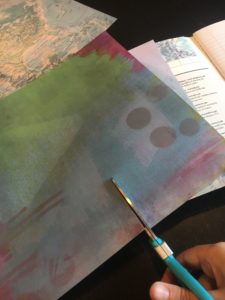
Step 1: Determine what design you would like on the outside and inside of your notebook. The ColorBok brand designer paper comes with 2 sheets of each design. I recommend you use both sheets of a design for the outside of your notebook. In this example, I selected the 2 sheets with the map of North American and blue-green marble design paper as an accent for the inside cover.
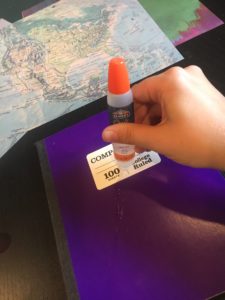
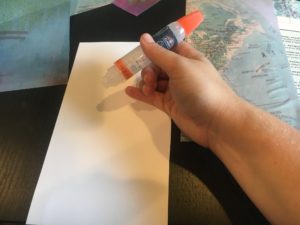
Step 2: Using the Elmer Craft Bond glue pen, apply glue to the front cover of the notebook.
Apply the glue to the cover.
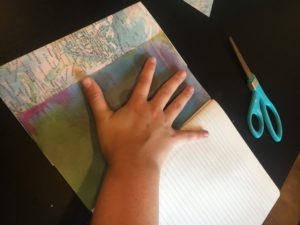
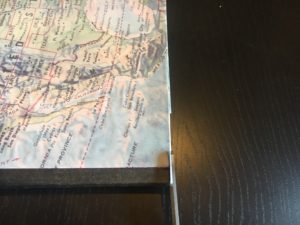
Step 3: Carefully line the first sheet of the design paper on the cover. You will want the edge of the paper to be laying next to the black fabric binding. There needs to be a paper overhang on the top and bottom. See the photo below.
Lay the paper so there is a slight overhang on the top and bottom of the notebook and the edge is laying right next to the black fabric.
Step 4: Press the paper to ensure that the paper is bound to the notebook. Try to push out any air bubbles to ensure the cover is flat and smooth.
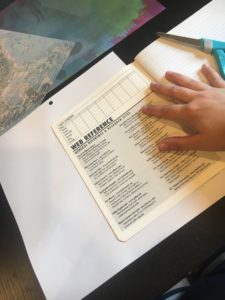
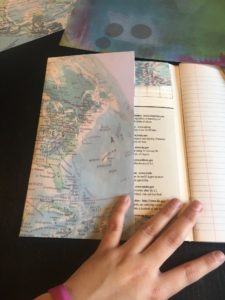
Step 5: Open up the notebook.
What the notebook looks like after opening.
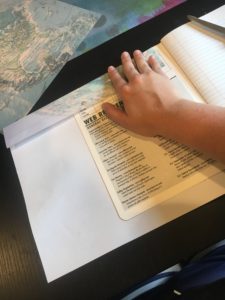
Step 6: Fold the overlay from the top and bottom over. The fold should lie right at the top and bottom of the cover (see photo below. After making the holds, you will glue the folded paper to the cover.
Hold the top and bottom extra paper.
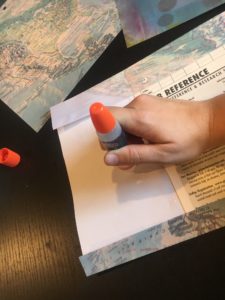
Step 7: Apply glue to the remaining paper that is not currently on the cover.
Apply glue to the remaining paper.
Step 8: Fold the section that you just glued on to the cover. Press to create a strong bond between the paper and the notebook. Try to remove any air bubbles at this time.
Hold the remaining paper to the cover.
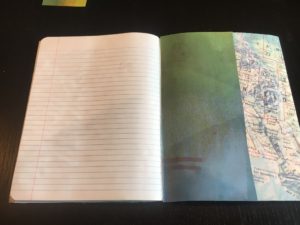
Step 9: Determine how much of the accent paper you will need for the inside cover. You can make this as big as you like. You can make it so that it covers up most of the inside cover or just the white part. I personally prefer this accent paper to take up 60-75% of the inside cover. Cut the accent paper to size.
Cut the accent paper.
Step 10: Apply glue to the back of the accent paper.
Apply glue to the accent paper.
Step 11: Apply the accent paper to the inside cover. You will want the edge of the accent paper to be right next to the first page of paper. Press to create a strong bond between the paper and the notebook. Try to remove any air bubbles at this time.
Place paper on the inside cover.
Step 12: Repeat steps 2-11 for the back cover.
Step 13: Wipe away all excess glue with a napkin.
Step 14: Place books and other heavy items on top of the notebook. This will help create a strong bond between the design paper and the composition notebook. Wait for approximately 20-30 minutes.
Place heavy objects on top of the notebook and allow the glue to dry.
Step 15: Examine the notebook. If there is any excess paper visible, use scissors to cut it even.
Cut off excess paper.
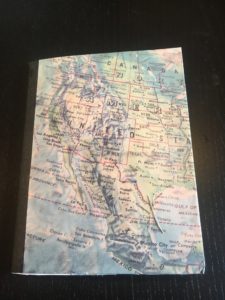
The notebook is now complete and ready for notetaking! Below are photos of the notebook that was made for this tutorial. I can’t wait to see what you all come up with!
The photo used in the image above is from MovieWeb.com.
Oh, Netflix suggestions they can be a hit or they can be a bust. I Give It a Year was a Netflix suggestion for me a few years ago, and I consider it a hit! I have seen this movie several times since it was initially suggested to me, and I have enjoyed every time I have watched it.
I Give It a Year is a romantic comedy that centers around a young couple’s first year of marriage. Nat is a highly ambitious advertising executive. Some of her friends and family members think that she is much better than Josh and they aren’t really a good couple. Josh is a writer who is more of a go with the flow kind of guy.
The movie begins with a quick musical montage of Nat and Josh’s dating relationship. It shows them meeting at a party, getting engaged in Vince a short time later. After the montage, we are invited to their wedding. Their wedding day is filled with mishaps from the priest unable to get through the vows without coughing to the best man’s super embarrassing speech. We don’t get to see the honeymoon after the wedding, but references/pictures from it come up time to time.
After the wedding and honeymoon, Nat and Josh try to adjust to married life. They meet with a lawyer to create a will, they have a dinner party with their friends, navigate the holidays, and they fight. One day at the advertising agency, a charming American (Guy) comes in looking for a new marketing campaign. One of Nat’s coworkers tells her to take off her wedding ring to get the business. This leads to many awkward situations, including one where Josh said he seems more like your type. During this time, Josh is trying the help Chole, his friend (and ex-girlfriend), navigate the difficult dating world. It seems Chole is still in love with Josh, but he doesn’t know. Will Nat and Josh make it to their first anniversary or will they break up? Will Nat choose Guy or Josh? Will Josh choose Chole or Nat?
This movie is a British comedy, so there is a lot of awkward situations. So if awkward situations aren’t really your thing, this movie would not be a good movie for you. I think the movie is hilarious and is the perfect anti-romantic comedy. Anna Farris plays Chole and is great as the lonely ex-girlfriend. Be sure to check it out on Netflix!
This month’s wine review is for a Moscato. I like Moscato wines because they are sweeter and are very tasty as you watch a movie on Netflix. This month’s wine suggestion with the CraftEaze crochet subscription box is the California Roots Moscato.
The California Roots is a wine brand that is found only at Target. I have spent a lot of time and money at Target. It has only gotten worse since they added the Hearth and Hand product line. I love watching Fixer Upper and its so much fun going through the Hearth and Hand section. Joanna Gaines style matches mine pretty well. I have also been on this organization kick the last few months, so I have been going to Target to find things to help with organizing my house. I really like their wooden cube storage units with the fabric boxes. It’s an easy way to add a splash of color to my home office.
What is nice about the California Roots wine is that it is only about $5. The California Roots Moscato has a fruity aroma. I taste peaches and melons as I sip this wine. I most recently enjoyed this wine after cleaning my living room while binge watching Grey’s Anatomy on Netflix. The bottle has a bear on it, what more can you ask for!
So next time that you are wondering around Target, and let’s be honest that will probably be in the next week or so, pick up a bottle.
Disclosure: CraftEaze is a participant in the Amazon Services LLC Associates Program, an affiliate advertising program designed to provide a means for sites to earn advertising fees by advertising and linking to Amazon.com and affiliate sites.
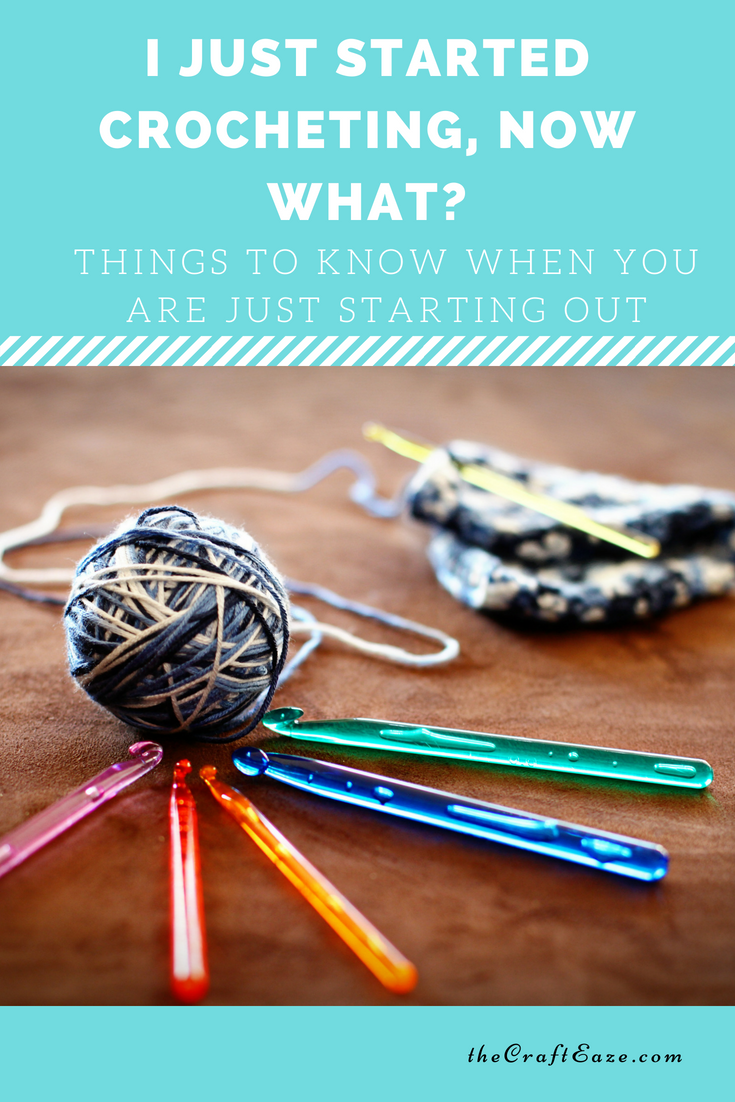
So you recently started to learn how to crochet, but what is the next step? Maybe you are confused by all of the abbreviations that are basically another language. Maybe you have spent way too much time trying to figure out how to make a double crochet. Or maybe you are tired of making scarfs for everyone in your family. Well, this is the post for you!
In this post, I will go over some of the most common abbreviations used in crochet patterns. I will go over the different types of yarn (weights and materials). I will show you how to perform some of the basic stitches. At the end of the post, I will provide you with some of my favorite places to find crochet patterns/projects.
Crochet Dictionary
The abbreviations that are used in crochet patterns can be overwhelming to a person who is new to crocheting. However, over time you will start to read a crochet pattern fluently without having to look up the abbreviations. The list below contains common abbreviations. This list is in alphabetical order. These abbreviations are a good foundation for most crochet projects. If you master these abbreviations, then you should be able to read most patterns.
* * = repeat instructions between asterisks as many times as directed
BL = back loop only
CC = contrasting color
ch = chain
dc = double crochet
dec = decrease
fl = front loop only
gauge = the number of stitches per inch and rows per inch that result from a specified yarn worked with a specified-size hook.
hdc = half double crochet
inc = increase
MC = main color
RS = right side
sc = single crochet
sc/dc/tr2tog = single/double/triple crochet 2 together
sl st = slip stitch
sp = space
tr = triple crochet
WS = wrong side
yo = yarn over
All About Yarn
Yarn can be bought in many different weights, colors, and fibers. Weight is the thickness of the yarn. The larger the number the thicker the yarn. So a yarn with a weight of 3 is thicker than a yarn with a weight of 0. The weight of the yarn can also be used to determine what the best hook to use. A thicker yarn with a weight of 6 will use a very large hook like M/13 (9 mm), whereas a yarn with a weight of 4 will use a hook that is slightly smaller like an I/9 (5.5 mm).
When you are shopping for yarn, you can find many different fibers. Fibers are what the yarn is made of. There are different synthetic and natural yarns. Most beginners start crocheting using acrylic yarn. Acrylic yarn is made from a polymer (Material Science to the rescue!). Acrylic yarn is relatively cheap and is produced by a variety of different companies. Acrylic yarn sometimes gets a bad rap because it can be itchy and uncomfortable to work with. However, this is not true for all acrylic yarn and an unfortunate myth. Cotton yarn is used to make garments. It can be bought in many different weights. What I like about cotton yarn is that it is lightweight and very durable. Wool is also a common yarn fiber. Wool is made from the wool of sheep, llamas, or alpacas. Wool yarn is a warm fiber that is used to make scarves, sweaters, and other autumn/winter clothing items. There are many different types of wool including merino, cashmere, mohair, angora, or alpaca. You can also buy blends that contain two or more fibers like an acrylic and cotton blend. These blends are used to make the yarn stronger, improve the washability of the yarn, and even change the appearance of the yarn.
I have been crocheting for several years now, and have found different yarns that I enjoy to work with. I like to use the bulky yarn for projects because you can see the progress of the project easily. However, I really like the bright colors that are found in the lightweight baby yarns. Here are some of my favorite yarns to work with for each weight.
Weight 0 – Lace
Aunt Lydia’s Crochet Thread – So this crochet thread is perfect to make lace with. I have used it to make nameplates in the past that I have used on my fireplace mantle. I have also used it to make a wall hanging that put in a frame for my grandparents. This crochet thread is made from cotton and comes in a variety of different colors ranging from white to black to purple to red.
Weight 1 – Super Fine
Red Heart It’s A Wrap – So I have to be honest, but I have never used a super fine weight yarn before. However, every time I go to Joann or Micheal’s I pick up this yarn and almost buy this particular yarn. I don’t really have a project in mind for this yarn, so I always talk myself out of buying it. I love the colors this yarn is available in and that it is a cake which makes cool color changes. I also like the fact it is a cotton and acrylic blend. So it will be easy to wash and work with. This will be the yarn I use when I finally try to make my first project using a super fine yarn.
Weight 2 – Fine
Sugar Bush Itty Bitty Yarn – So I am using this yarn to make a lightweight summer vest. This vest pattern has many small openings and this yarn is perfect to make the designs. The yarn is great for clothing because it is a blend of merino wool, cashmere, and nylon.
Weight 3 – Light
Lion Brand Baby Soft Yarn– I love using this yarn to make baby blankets! I make a lot of baby blankets because many of my friends are having babies and my mom’s friends are having grandbabies. This yarn is an acrylic and polyamide blend. Both of these fibers are synthetic fibers, so the yarn is machine washable which is very important for a baby blanket. The yarn comes in many different colors that are perfect for baby blankets.
Weight 4 – Medium
Red Heart Boutique Unforgettable – So I am going to cheat a little on this weight and give you two of my favorite yarns. The first one is the Red Heart Boutique Unforgettable yarn. I have used this yarn several times in the past to make scarves for gifts, to sell, and even to wear myself. This yarn is 100% acrylic. I love the color combinations available and it is also fairly soft. There are fairly long color sections that make this yarn self-striping.
Caron Simply Soft – This is my go-to yarn for most projects. I have made blankets, baby hats, adult hats, headbands, and a sweater from this yarn. This yarn is an acrylic yarn, but it is so soft. It is easy to work with and is available in many bright colors and even variegated yarns. Most recently, I have been using this yarn to make an argyle scarf using the Paint and Camo colors.
Weight 5 – Bulky
Bernat Maker Home Dec Yarn– This is a fun yarn to work with to make pillows and other home decor items. I have also used this yarn to make a market bag. This is a tubular yarn that contains a cotton shell with nylon filling. The yarn is available in bright and modern colors. It is easy to work with and is very soft. I have created a couple of crochet patterns that use this yarn for throw pillows. You can find some of these patterns at our Etsy shop (www.etsy.com/shop/CraftEazePatterns).
Weight 6 – Super Bulky
Bernat Blanket/Baby Blanket Yarn– So I like to work with super bulky yarns, and as a result, I’m going to provide you with my two favorite super bulky yarns. The first one is the Bernat Blanket and Baby Blanket yarn. This yarn is very soft and warm. The yarn is made from polyester. If it is used to make a baby blanket, it can is so soft and thick that it will make a great blanket for tummy time. I made my dad a blanket using the blanket yarn, and he said it is so soft and warm.
Lion Brand Hometown USA Yarn– I have used this yarn in the past to make winter hats and a Katniss cowl for my sister. This yarn is acrylic yarn. It is soft and each color has a US city in the name like New York White and Cincinnati Red. Another cool feature for this yarn is that its made in the USA.
Learning the Basics
So there are a handful of stitches that are the bases of almost every pattern. If you can master these stitches, then you should have the background to work on many projects and patterns. In this section, I will give you the steps to make the chain followed by a video tutorial. The stitches will progressively get taller as you go along. At the end of the post, there will be a video to show you how to make a magic circle which can be used if you are crocheting in a round.
Chain Stitch
The chain stitch is the first stitch that you will learn. This is because you make a foundation chain to start a project. Steps 1-2 are used to start the foundation chain only (aka the first chain of a project).
Make a slip knot and place it on the hook. Wrap the yarn around the hook (yarn over hook).
With the yarn at the tip of the hook draw the loop through the loop on the hook. This makes the first chain.
Repeat, yarn over (yo) and pull this loop through the loop on the hook until you have the desired number of chains.
Slip Stitch
The slip stitch can be used in a chain stitch or a row stitch (aka single crochet/double crochet/etc.). In the written instructions, the row stitch instruction will be in the paratheses. The slip stitch can be used when you are working in a round, joining a new color, to make a trim, or to invisibly move to another part of a row.
Insert hook into the chain (under top 2 loops).
Yarn over (yo) and pull through chain (stitch) and loop on the hook in one motion.
Single Crochet
The single crochet (sc) is one of the most commonly used stitches in crochet patterns. The single crochet is considered a row stitch. This stitch can be used in a chain and in a row stitch.
Foundation Chain Sc
Insert hook into the second chain.
Yarn over (yo) and pull through both loops on the hook.
Insert hook into the next chain.
Yo and pull through both loops on the hook.
Repeat steps 3 and 4 the desired number of times.
Row Sc
To start the row, chain 1.
Insert the hook front to back of the top two loops of the first stitch of the row below.
Yo and pull through the stitch.
Yo and pull through both loops on the hook.
Repeat steps 2-4 the desired number of times.
Half Double Crochet
The half double crochet (hdc) is the third shortest stitch after the slip stitch and single crochet. The half double crochet is considered a row stitch. This stitch can be used in a chain and in a row stitch.
Foundation Chain hdc
Yarn over and insert hook into the third chain.
Yarn over (yo) and pull through all three loops on the hook.
Yarn over and insert hook into the next chain.
Yo and pull through the three loops on the hook.
Repeat steps 3 and 4 the desired number of times.
Row hdc
To start the row, chain 2.
Yarn over, and insert the hook front to back of the top two loops of the first stitch of the row below.
Yo and pull through the stitch and loops on the hook.
Repeat steps 2-3 the desired number of times.
Double Crochet
The double crochet (dc) is the second tallest stitch after the triple crochet, that I will go over in this post. The double crochet is considered a row stitch. This stitch can be used in a chain and in a row stitch.
Foundation Chain dc
Yarn over (yo) and insert hook into the fourth chain.
Yo and pull through the chain.
Yo and draw through first 2 loops.
Yo and draw through the remaining 2 loops.
Yo and insert hook into the next chain.
Repeat steps 2 through 5 until desired stitches are made.
Row dc
To start the row, chain 3.
Yarn over, and insert the hook front to back of the top two loops of the first stitch of the row below.
Yo and pull through the stitch.
Yo and pull through the first 2 loops.
Yo and draw through remaining 2 loops.
Repeat steps 2-4 the desired number of times.
Triple/Treble Crochet
The triple/treble crochet (tr) is the tallest stitch that I will go over in this post. The triple/treble crochet is considered a row stitch. This stitch can be used in a chain and in a row stitch. This stitch is called a triple crochet in the United States but it is called a treble crochet elsewhere.
Foundation Chain tr
Yarn over (yo) twice and insert hook into the fifth chain.
Yo and pull through the chain.
Yo and draw through first 2 loops.
Yo and draw through the next 2 loops.
Yo and draw through the remaining 2 loops.
Yo twice and insert hook into the next chain.
Repeat steps 2 through 5 until desired stitches are made.
Row tr
To start the row, chain 4.
Yo twice, and insert the hook front to back of the top two loops of the first stitch of the row below.
Yo and pull through the stitch.
Yo and pull through the first 2 loops.
Yo and draw through remaining 2 loops.
Repeat steps 2-4 the desired number of times.
Magic Circle
A magic circle is sometimes used when crocheting in a round. I have used a magic circle to make hats and stuffed animals. In my opinion, a video is the best way to learn how to do this stitch. The video below is one that I have used several times when trying to remember how to make a magic circle.
Favorite Places to Find Patterns or Ideas
So now that you have learned the basics, its time to find some cool patterns. There are so many places where you can find projects, but here are some of my favorite places.
Books
So one place I have found projects is through books. Here is a list of books that I have used in the past to find projects.
So I was wondering around Barnes and Nobles one day after I moved to Ohio and came across this book. Several of the projects are super cute and it is also a great book for beginners. There is step by step directions of how to make certain stitches with pictures. I have made several patterns in the book including a bag, sweater, and shawl.
This is the first book I bought to help teach myself how to crochet. The cool thing about this book is that it comes with hooks. This is obviously a great book for beginners who are learning the art. The patterns progressively get hard as the book goes along. Even though this book is for beginners there are some great blanket patterns inside.
I received this book for my birthday one year. This book is a great resource. There are so many instructions to make different types of trims and stitches, but it also contains some cool pattern that varies in skill level.
Online
You can find many crochet patterns online. Some of these patterns are free, while others you have to buy.
Ravelry (www.ravelry.com/account/login) is a social network for people who do yarn art. There are so many patterns available on Ravelry. The search feature is very nice because you can search based on a variety of different parameters. If you know you want to make a scarf, you can search for a scarf but also include other parameters such as hook size, skill level, amount of yarn, or even if its free or a paid pattern. You can also post your completed projects in Ravelry, join groups, find local crochet groups, and comment on other crocheter’s projects.
Pinterest (www.pinterest.com/) is one of the most popular social networks. But did you know that you can use Pinterest to find crochet patterns? There are so many patterns available on Pinterest, so there is no limit on what patterns and projects you can find.
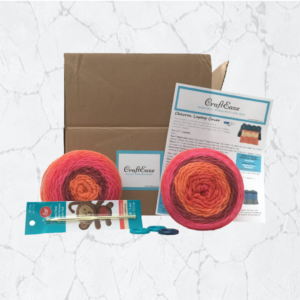
Our subscription crochet box will send a project to your door every month.
Our website (theCraftEaze.com) is another resource to find new projects. What’s special about CraftEaze, is that we have a subscription service which will send you a new project monthly. The subscription service contains all materials needed to make a particular project in addition to a Netflix and wine suggestion. It also provides access to a private Facebook group which is like an online craft group. You can sign up for our subscription service at thecrafteaze.com/Subscription. Each month, we have a Facebook live video revealing this month’s project. We talk about the materials that are included in the CraftEaze box, the wine suggestion, and the Netflix suggestion.
CraftEaze also sells individual projects that were featured in each month’s CraftEaze box. These projects are well suited for beginners. We provide tutorials for any stitched used in the project. You can find a list of past projects at thecrafteaze.com/individual_projects.
I hope you enjoy learning how to crochet and making new projects!
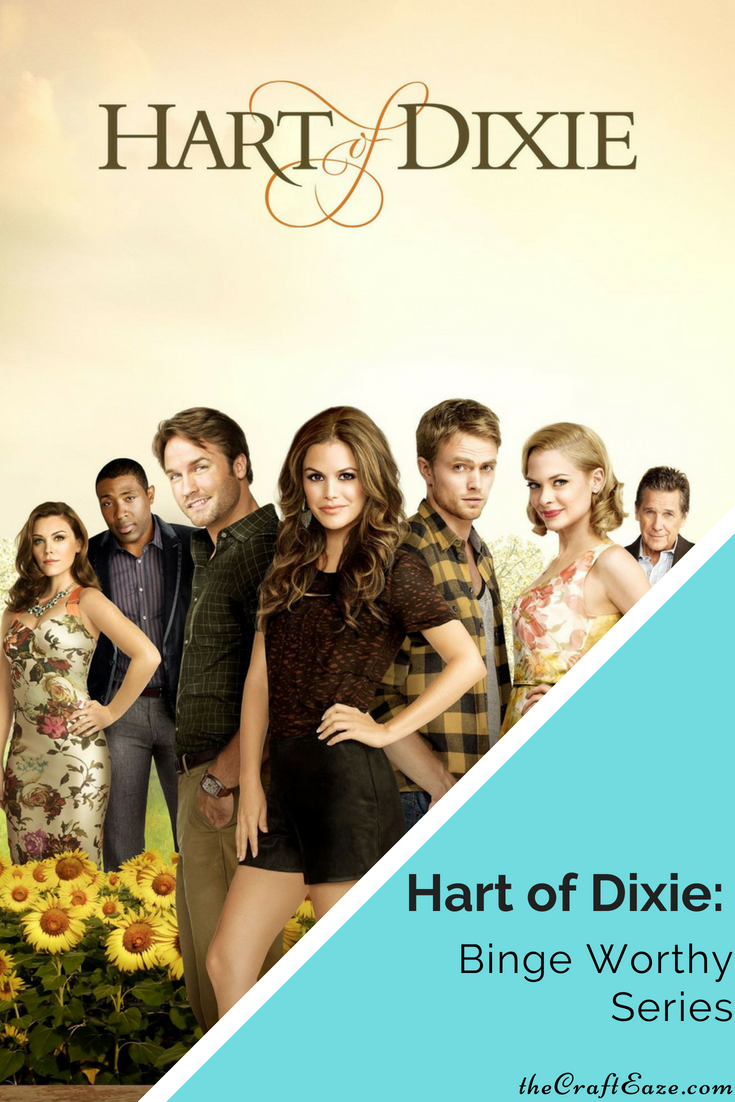
Are you looking for your next Netflix series? I don’t know about you, but I always have a hard time deciding what to watch next when I finish a series on Netflix. Sometimes the shows Netflix suggests you watch next are busts, but other times they really are hits. A few years back I had finished a series, and Netflix suggested Hart of Dixie. This is one of the times that Netflix was really spot on with their suggestion.
Hart of Dixie aired on the CW station. It was a romantic comedy/drama show that aired for four seasons. The first episode starts at a medical school graduation where we meet the main character, Zoey Hart. Zoey meets this old man who tells her if she ever needs a job, that she is more then welcome to join his practice in Bluebell, Alabama. However, Zoey really wants to be a cardio-thoracic surgeon like her dad and loves her New York lifestyle. Her dreams come crashing down, and she decides to take the old man up on his offer. She moves down to Bluebell, Alabama.
Source: imbd.com
As soon as Zoey gets to Bluebell, she realizes that she doesn’t really fit in. The old man who offered her the job had died. The other doctor, Brick, seems to hate her, and his daughter, Lemon, see Zoey as a threat and treats her as such. There is a cute lawyer, George, who she is interested in, but soon finds out that he is dating Lemon. Her only friends are the nurse at the practice, the nurse’s niece, and a former football player who just happens to be the mayor, Lavon. Lavon allows her to live in his guest house, but she has to put up with Wade, another tenant who she finds annoying but attractive.
After a disastrous first week in Bluebell, Zoey is ready to leave and head back to New York. As she is getting ready to leave, she finds out that the old man has left here half of the practice because he was her biological father. She decides to stay because the life she knew in New York was not really what she thought it was. Over the next several episodes she learns more about her family and slowly adjusts to life in Bluebell.
Since Zoey is a New Yorker, there are interesting medical situations she finds herself in. In one of the first episodes, a kid comes in with a snakebite. She isn’t sure what type of snake bite him and goes in search of the snake. As a result, she ends up getting bitten by the same copperhead. Brick riducles her about this because he knew based on the old house the kid got bite in that it had to have been a copperhead. Another time tells a patient that he is dying of this rare disease, but in reality, he only has a tick bite. She slowly learns about ailments that seem to plague a small town.
She also runs into unusual social interacts in her new home. Lavon helps her adjust to her new lifestyle. Lavon invites her to take part in local activities like the Founder’s Day parade. Over time, she learns she needs to take part in local festivals and competitions to learn how to relate to her patients. She is a little stubborn about some of these changes, like for example who will cut her hair and refusing to make her own gumbo. Over the series, she becomes more and more at home in Bluebell.
So there are many things that I love about Hart of Dixie. First, it is enjoyable watching Zoey transition from the fast pace New York lifestyle to the slower more laid back life in Bluebell. It reminds me of the small town life I remember growing up. Secondly, it is a medical show like House and Grey’s Anatomy, but it isn’t as depressing or predictable. House and Grey’s Anatomy, seems to follow the same format every episode where there is a patient who needs help, they almost die, they are healed with a little bit of drama between doctors thrown in. Hart of Dixie is typically upbeat and there are storylines with many of the characters that are unrelated to medicine. Each episode is about 40-45 minutes long, but it is so easy to sit down and watch several episodes in one day I also love the characters. Even the characters I hated at the beginning of the series, I start to enjoy their development as the series progresses. It is also fun trying to figure out who Zoey will end up with. Will it be Wade, George, or some other handsome stranger?
The set of Hart of Dixie is very bright and colorful. It looks like a southern wonderland. It’s like if you take all of the southern bridal magazines you see in the checkout line at Micheals and combined different aspects to make the most perfect and cute set. Lemon and Annabeth wear the cutest most colorful clothes which contrast well with Zoey’s contemporary New York style. The playlist of the series is amazing. I also found many great songs on the show like this one:
So if you are in a rut trying to find something new to watch, you should check out Hart of Dixie!
Disclosure: CraftEaze is a participant in the Amazon Services LLC Associates Program, an affiliate advertising program designed to provide a means for sites to earn advertising fees by advertising and linking to Amazon.com and affiliate sites.
So if you are like me, I bet you have probably been scanning Pinterest for the last several years. I bet you have scanned it while watching tv, eating lunch alone when you’re supposed to be working, or even when you are trying to avoid an awkward conversation with an acquaintance who you may not be very fond of. I have scanned Pinterest for recipes, craft ideas, and home decor ideas. However, I have to say one of the things I have spent a lot of time on Pinterest looking at is things related to weddings. Even when I was not dating someone, I spent a lot of time looking at ideas for wedding decor, table settings, bouquets, and the best readings for a Catholic wedding. It is fun to daydream what my future wedding would be like or even try to guess how much a Pinterest wedding would cost.
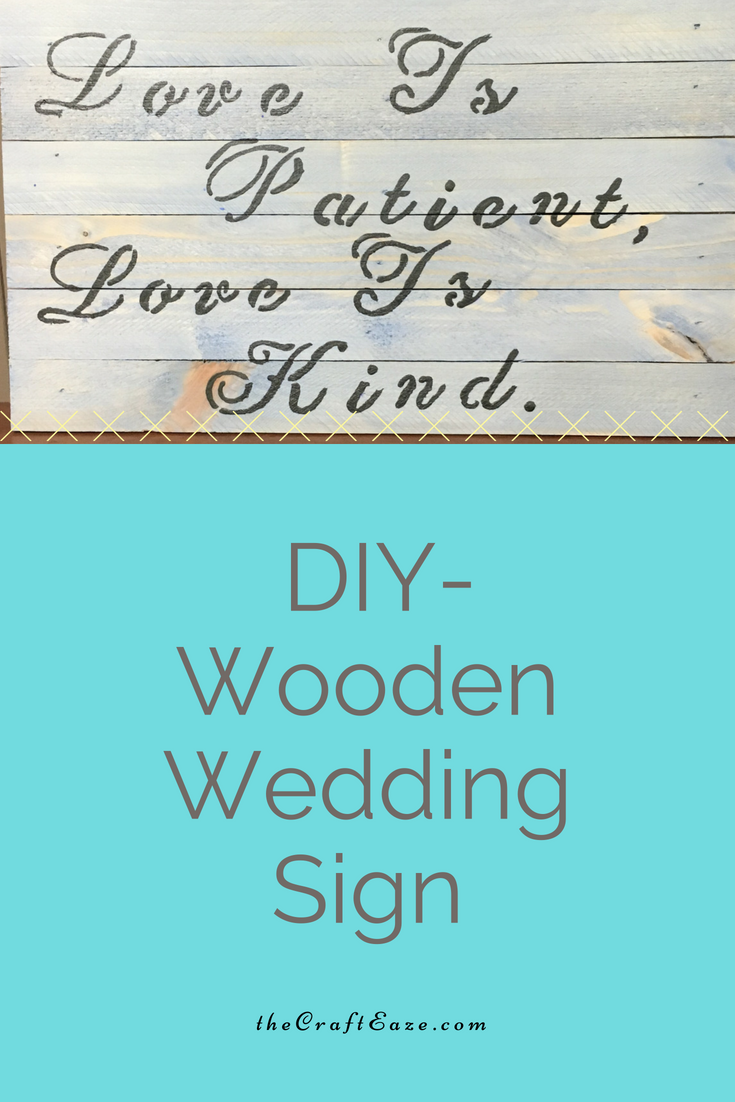
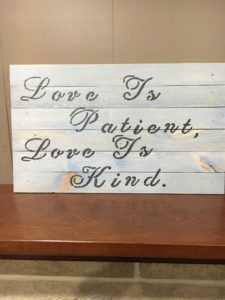
One of the wedding trends on Pinterest that I think can be very elegant (if done correctly) is the rustic wedding. I like that it gives a new life to old things with a modern twist. It is also great for brides on a budget because it can be DIY or even use things you find at a garage sale. One item that seems always pops up in the rustic wedding pins is the wooden sign. These signs can have a variety of different things written on them. Pinterest has wooden signs with love quotes like “Love is Patient, Love is Kind”, signs with important dates (like their first date, proposal date, and wedding date), signs pointed to the gift table/cake table, or even signs with signature drinks listed on them.
This post will go over the steps to make an awesome wooden sign. You can use this sign at your amazing wedding, but you can also make a sign to hang in your home. One jar of pickling wash and 2 oz bottle of acrylic paint can be used to make multiple signs. You can buy a kit at our store here.
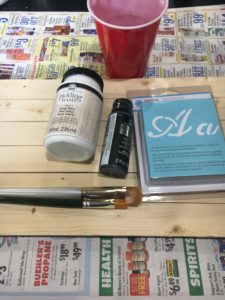
Step 1) Put down a newspaper to prepare your work area.
Step 2) Apply the pickling wash to the board. Let the pickling wash soak in for about 30 seconds and then wipe away the excess wash. You will need to apply at least 2 coats.
Step 3) Wait about 30 minutes to 1 hour for the board to be dry to the touch. During this time you can figure out what you would like to put on the sign.
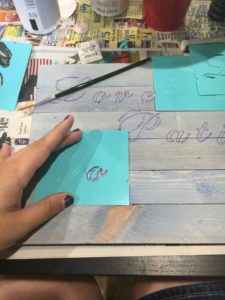
Step 4) Using the stencil kit, ruler, and ink pen/pencil trace out the phrase that you would like on the sign.
Using the stencil kit, ink pen, and ruler trace the quote.Once the lettering is done, you will start to paint the lettering.
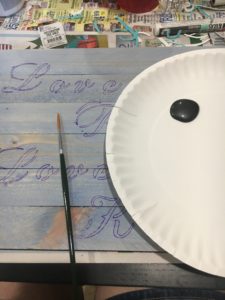
Step 5) You will need to paint inside the marks on the boards with the small paintbrush. Try to carefully cover up the marks. However, don’t worry if there is still a little bit of the pen/pencil marks showing. These small marks will be difficult if not impossible to see.
Paint between the pen/pencil marks with the black paint and small brush.
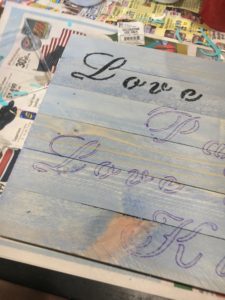
Step 6) Allow for the acrylic paint to dry. After it drys it is ready to be displayed.
It’s time to let your finished creation dry!
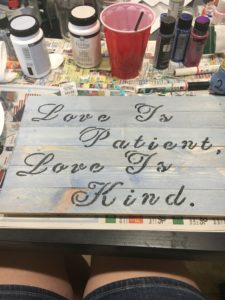
Here is my finished creation sitting on my fireplace. Hope you have fun making this sign.
Disclosure: CraftEaze is a participant in the Amazon Services LLC Associates Program, an affiliate advertising program designed to provide a means for sites to earn advertising fees by advertising and linking to Amazon.com and affiliate sites
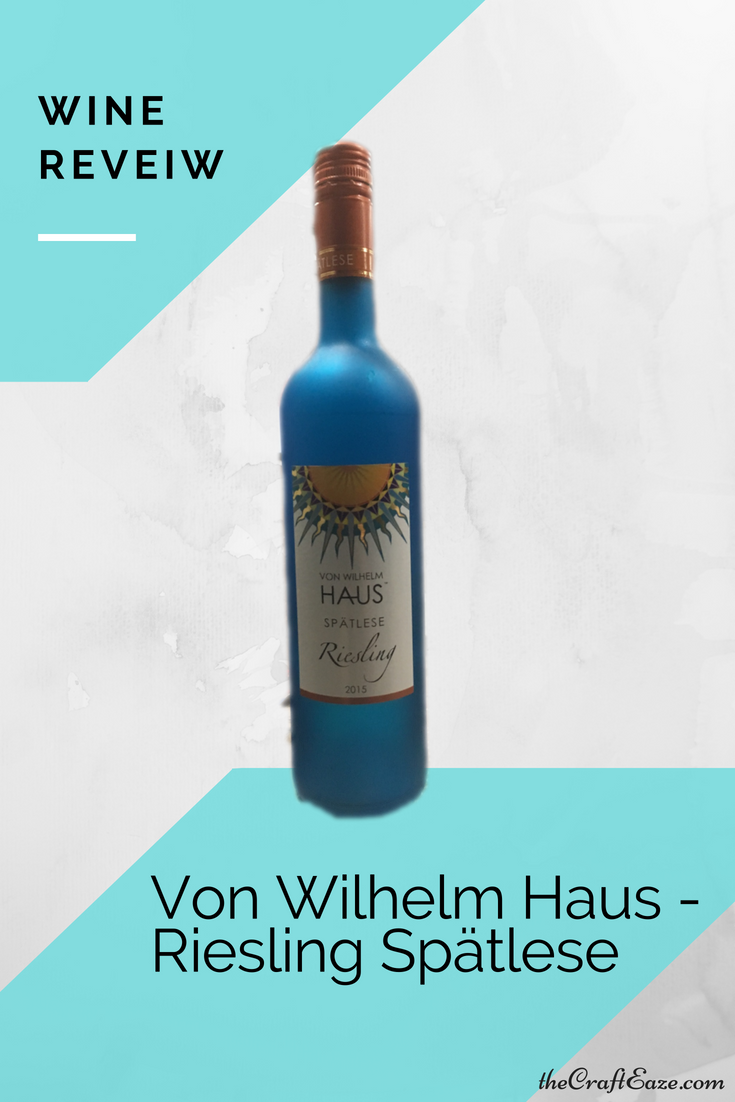
So this month’s wine review once again features a Riesling. Like I said last month, I really enjoy Rieslings. This month’s wine suggestion with the CraftEaze crochet subscription box was Von Wilhelm Haus Riesling Spätlese.
So I have been eying this bottle for several months now at the grocery store. I was initially drawn by to the bright blue bottle, but the fact it was a Riesling made me want to try this wine. I finally broke down and bought a bottle while my boyfriend was out of town on vacation for a wine and craft Friday night. And I have got to say, I was not disappointed.
The Von Wilhelm Haus winery is in Mosel, Germany. So it is a German Reisling. This wine is a sweeter Riesling, which makes it well suited for dinner and as a sipping wine while relaxing on the couch. When I sip this wine, I taste a slight apple flavor. This wine would be delicious with a Cajun blackened chicken or shrimp dinner. The other thing I love about this wine is that it’s very reasonably priced. I bottle the bottle for less the $10 at my local ACME.
This wine bottle will also be great for crafts. Due to the color, you could insert a string of fairy string lights inside (such as these). Below is a picture of a wine bottle that I inserted the fairy string lights into. This would be beautiful on a fireplace mantle or on a gift table at a wedding. This is also a super easy gift to make for a friend, family member, or coworker.
Here is an example of a wine bottle were I inserted lights inside.
Disclosure: CraftEaze is a participant in the Amazon Services LLC Associates Program, an affiliate advertising program designed to provide a means for sites to earn advertising fees by advertising and linking to Amazon.com and affiliate sites.
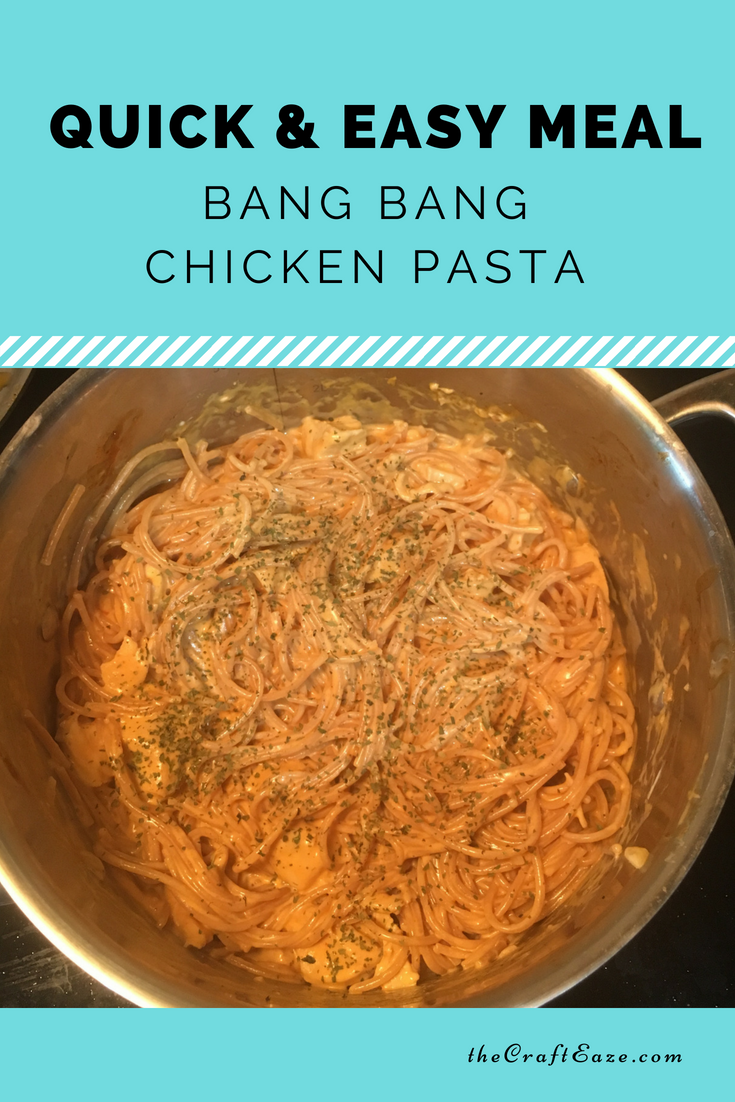
So I don’t know about you, but I am exhausted and starving when I get home from work. The last thing I want to do when I get home is to spend an hour or so to make a meal that my boyfriend and I will eat in about 5-10 minutes. Also, do you have the constant struggle in your home about what to eat? I know that this is a big deal for me. I like a little variety when it comes to food, whereas my boyfriend loves what he calls “bowl meals” and would be perfectly happy eating the same thing every day. He calls a meal a “bowl meal” when it only uses a bowl. He likes “bowl meals” because he can eat it anywhere from the table to the couch to the bar. This meal is perfect for me because it is quick, easy, makes only a handful of dishes, is something different, and we typically eat it out of a bowl!
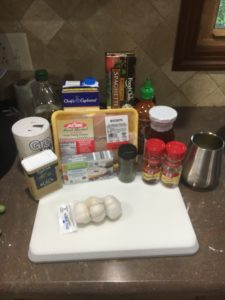
This is a photo of the ingredients for Bang Bang Chicken Pasta.
So you likely have many of the ingredients for this meal in your pantry already. Here is a list of ingredients you will need to make this meal:
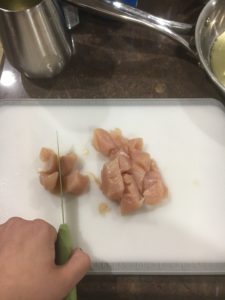
1 lb of chicken breast
1 cup chicken stock
Olive oil
1 box (8 oz) cream cheese
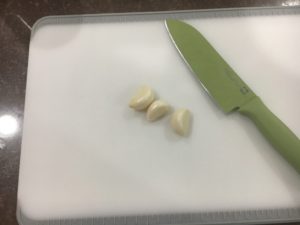
Garlic
Spaghetti noodles (I use whole wheat spaghetti to make it a little healthier, but you can use normal spaghetti noodles).
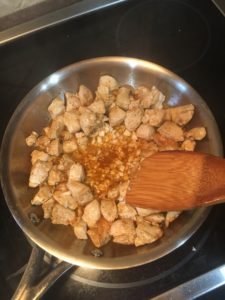
Step 4) Once the chicken is cooked, you will add the minced garlic to the skillet. You will saute the chicken and garlic for about a minute.
Add the minced garlic to the skillet. Saute for a minute or so.
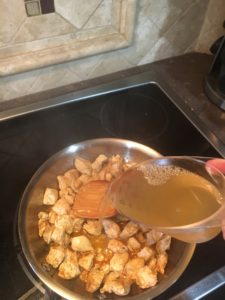
Step 5) Add the 1 cup of chicken stock to the skillet. Reduce the heat to medium-low and put a lid on the skillet. The chicken stock will reduce slightly.
Add the chicken stock to the skillet with the minced garlic and chicken breast.
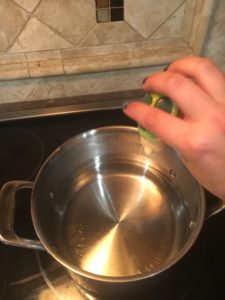
Step 6) While the chicken stock is reducing, you will boil water for the spaghetti. You will want to put a little salt in the water as you boil it. In the words of Alex Guarnaschelli from the Food Network “If it’s in a pot, you need to add salt”.
Boil water for the spaghetti noodles. Be sure to add a little salt to the pot!
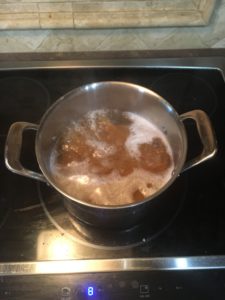
Step 7) Once the water starts to boil, add the spaghetti noodles. You will cook the spaghetti until it is al dente (about 8 minutes). I have an induction stove top, so water boils really quickly.
Add the spaghetti noodles to the boiling water.
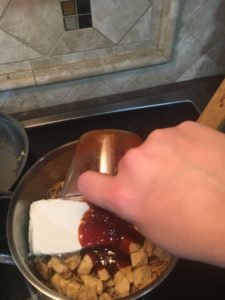
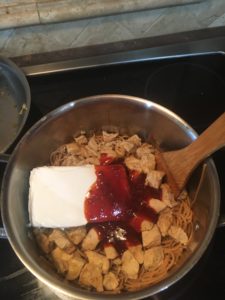
Step 8) Drain the water from the pasta. After draining the water, you will move the pot back to the stove where you will add the chicken, garlic, and chicken stock from the skillet into the pot. Followed by the cream cheese and 1/4 cup of sweet Thai chili sauce.
Add the contents from the skillet, the cream cheese, and the sweet Thai chili sauce to the pasta.
Step 9) Stir the contents of the pot until a sauce is formed and evenly coating the pasta.
Stir the contents of the pot until a thick sauce is formed and it evenly coats the pasta.
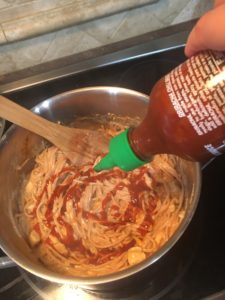
Step 10) Add sriracha sauce to taste. I like to make a spiral in the pot. After adding the sriracha sauce, you will stir it one more time.
It’s time to add the sriracha!
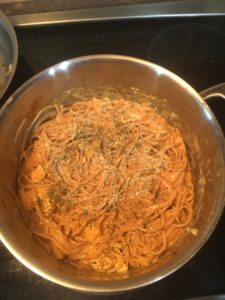
Step 11) After stirring the sriracha sauce in, all you need to do is sprinkle a little of cilantro on the pasta.
Sprinkle on a little cilantro.
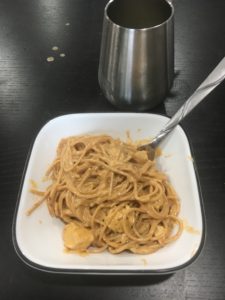
After you add the cilantro, the meal is ready to eat! Like I said, I like this meal because it is a little different from the meals I normally make and my boyfriend likes the meal because it is a “Bowl Meal”. Last time I made this meal, I enjoyed it while watching an episode of The Ranch with my boyfriend. I hope you enjoy this meal just as much as I do!
The finished creation! I like to enjoy a glass of wine with this meal in my stainless steel wine glass. It keeps the wine nice and cold for a long time.
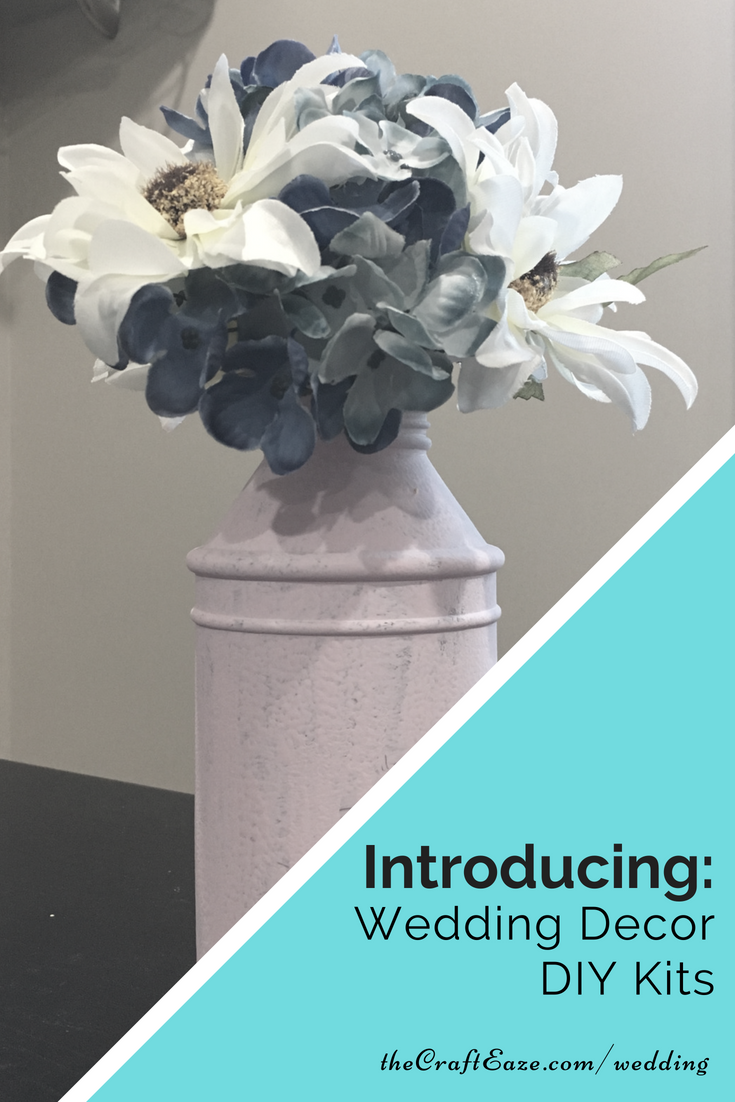
So I am really excited to announce CraftEaze’s newest line of products, the wedding decor DIY kits! I feel this product line will be very helpful for the bride that likes the idea of DIY decorations, but a) has no time to visit the craft store to buy supplies, b) unsure what colors or items would work well together, or c) brides who may have a slight craft addiction so by recommendation from their friends, family, and fiancee are supposed to avoid Joann or Michael’s at all costs!
These kits will before a variety of different wedding decor items. Some of the decor items may be table decorations, while others may be related to the ring bearer or flower girl. Each decor kit will come with a special suggestion for the bride. This suggestion may be a drink recipe, a movie to watch, or a sweet snack suggestion.
Our first product in this line is the Rustic Flower Vase. This flower vase is available in 5 different colors (baby blue, light grey, light pink, light purple, and teal). The paint is a matte finish which helps give the vase a nice rustic feel. This kit contains enough material to make 5 vases. These vases can be used for table decorations, table number displays, as decoration around the cake, or in the ceremony venue. This flower vase also comes a list of with possible flower combinations that can be used if the bride wants.
Be on the lookout for new and exciting wedding decor kits to come in the near future!


 Stitch ‘n Bitch Crochet – The Happy Hooker
 I Taught Myself Crochet
 Crochet – The Complete Step By Step Guide